I still remember the sinking feeling in my stomach when I checked my electric vehicle’s dashboard battery health indicator last winter. I had only owned the car for fourteen months, yet the maximum capacity had already dropped by a staggering four percent. I was doing everything I thought was right: plugging it in the moment I parked in the garage, letting it sit at a full one hundred percent charge, and waking up to a warm cabin. It was convenient, but my battery was silently cooking itself to death. This was my wake-up call that raw convenience is the absolute enemy of lithium-ion longevity.
The Cost of Leaving Your Car at Full Charge
When you plug your vehicle in without a set schedule, it usually blasts its way to a full charge within a few hours and then sits there for the rest of the night. This high state of charge puts immense chemical stress on the battery cells. Think of it like stretching a rubber band to its absolute limit and leaving it there for ten hours every single day; eventually, it loses its elasticity. I learned this lesson the hard way, but you do not have to. By simply taking control of when your vehicle receives power, you can dramatically slow down this chemical aging process.
Is schedule optimization actually worth the hassle?
You might be wondering if setting up a complex charging schedule actually makes a measurable difference, or if it is just another tech obsession that yields marginal results. Skepticism is healthy here. However, data from battery research organizations like Battery University confirms that keeping a lithium-ion battery at elevated temperatures and a high state of charge simultaneously accelerates capacity loss exponentially. By shifting your charging window to finish right before you plan to leave, you minimize the time your vehicle spends sitting at maximum voltage, which directly preserves its active materials.
How Your Charging Habits Impact Home Infrastructure
Early on, my biggest mistake was setting my charger to run at maximum amperage during peak household hours. Not only did this stress my battery, but it also caused my garage electrical panel to run incredibly warm. If you are experiencing similar issues, you might want to look into upgrading your panel for better ev charging performance to prevent system fatigue. Additionally, you should make sure you are not falling victim to the smart way to schedule charging without overloading your service so you can protect both your home and your car. Have you noticed your home lights flickering or your charger acting sluggish when you plug in overnight? Drop a comment below and let me know how your current setup is holding up.
How to Program Your Charger to Stop Overheating Your Panel
Managing the electrical load of a Level 2 charger is like coordinating traffic on a narrow single-lane bridge. If you try to push 48 amps of continuous current through your panel while your home’s central air, electric dryer, and oven are running, you create an electrical bottleneck. This causes thermal buildup. I learned this the hard way during a scorching heatwave when my garage smelled faintly of hot plastic. I opened the breaker box to find the plastic casing around my main feed slightly warped. After that close call, I realized I needed to know how to read the load calculation your electrician sent you to truly grasp my home’s limits.
Calculate Your True Household Load Capacity
Before you adjust your charging schedule, you need to determine your continuous load margin. Most homes feature a 100-amp or 200-amp service panel. An EV charger is classified as a continuous load, meaning it draws peak current for hours at a time. This requires you to size your circuit breaker at 125 percent of the charger’s output. If you live in an older home with 100-amp service, look into 5-signs-your-old-electrical-panel-is-a-charging-bottleneck to understand why your breakers might feel warm. Running a load calculation tells you exactly how many amps are left over for your vehicle once your baseline appliances are active.
Program the Delay and Throttle the Amperage
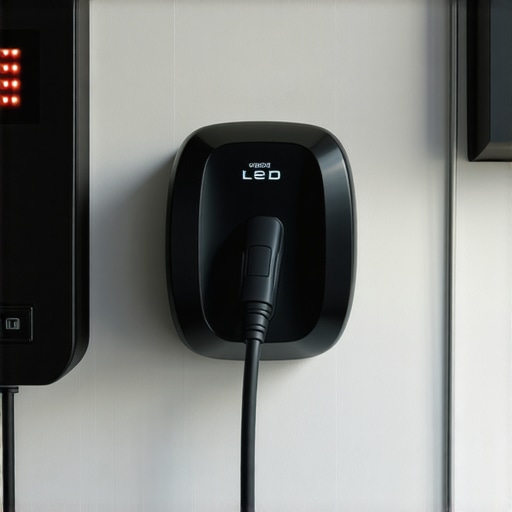
Once you know your home’s electrical limit, you can configure your hardware safely. Open your charger’s companion smartphone app and navigate to the current limit settings. If you have a 50-amp circuit, your maximum safe continuous draw is 40 amps. However, you do not always need to charge at maximum speed. By dropping the current to 24 or 32 amps in the app, you significantly lower the temperature inside your electrical panel. Next, schedule the charging session to start at 2:00 AM. This is when household power demands are lowest and utility rates are cheapest. If your software refuses to cooperate with these settings, you might be dealing with a common network issue; check out how to resolve this by reading about why your smart charger is losing its wifi connection so you can keep your automation running smoothly.
Ensure Your Connection Points Can Handle the Stress
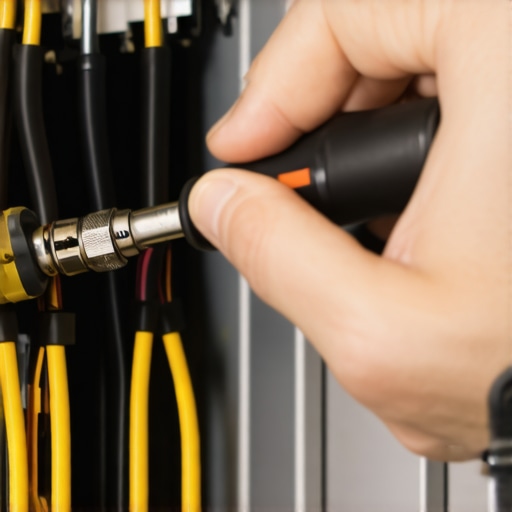
Amperage throttling is a great software fix, but it cannot save poor physical connections. Heavy-duty electrical connections must be tightened to exact specifications to prevent resistance. High resistance generates intense local heat, which is a prime culprit for melted breakers. During my own troubleshooting, I discovered that my installer had skipped the final torque check. To prevent this hazard in your own home, read up on the specific torque settings that prevent garage fires. Checking these physical connections ensures that even if your vehicle pulls maximum power, your infrastructure will remain completely cool and stable.
When I first started detailing my EV charging journey, I assumed that passing an electrical inspection was just a matter of following a basic checklist. I believed, like many others, that if the charger powered on and the car accepted the charge, the system was completely safe. But as I dug deeper into local electrical codes and chatted with seasoned inspectors, I realized how wrong I was. There is a massive disconnect between a charger that simply works and one that is fully code-compliant and structurally safe for your home.
Why is a panel upgrade not always the best first step?
Everyone in the EV forums will tell you that if you have a 100-amp panel, you absolutely must spend thousands of dollars on a full service upgrade before installing a Level 2 charger. However, in my experience, rushing into a massive utility service change is often an expensive and unnecessary trap. Many homeowners overlook modern load management systems that can dynamically pause your car’s charging session when your electric oven or clothes dryer kicks on. Understanding how load management modules prevent expensive panel upgrades can save you a fortune while keeping your existing system perfectly safe and compliant with the National Electrical Code (NEC).
According to safety reports from the National Fire Protection Association, the vast majority of residential electrical failures stem not from capacity limits, but from improper installation and poor terminations. This brings us to the ultimate installation mistake: ignoring the physical stress on your wires. I have seen DIYers pull cheap, undersized Romex through tight spaces, completely unaware of how much heat builds up during an eight-hour charging cycle. If you are planning your own installation layout, make sure you know the wire gauge mistake that fails 40 percent of inspections to keep your home safe and avoid costly redos.
Another common compliance pitfall involves the outdoor environment. If you mount your charger on an exterior wall or near a carport, the physical installation standards change dramatically. Many people do not realize that standard indoor safety switches do not cut it when moisture enters the equation. For example, understanding why your outdoor charger needs a specific type of GFCI protection is critical to preventing nuisance trips during heavy downpours. Even a minor oversight in conduit depth or grounding electrode connection can void your vehicle’s warranty and leave you with a massive troubleshooting headache. Have you ever fallen into this trap or had an inspector flag something unexpected? Let me know in the comments below so we can keep the conversation going.
Once you navigate the complexities of permits and wire gauges, you enter the long-term ownership phase. This is where many EV owners let their guard down. They assume that because the system is safe today, it will remain pristine forever. However, a Level 2 charger pulls massive continuous current week after week, creating ongoing thermal expansion and contraction cycles that can slowly loosen physical terminals over time.
How do I maintain my EV charging system over time?
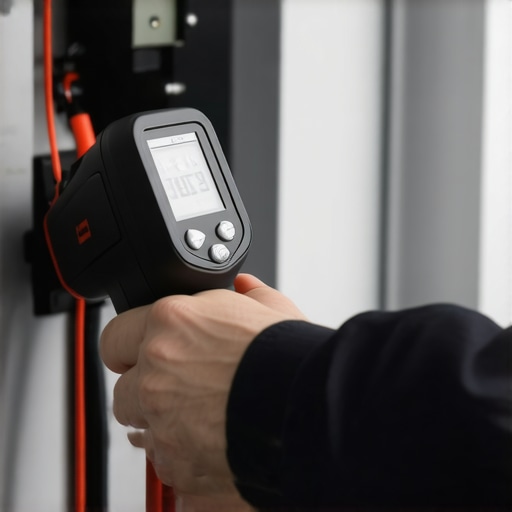
To keep my garage safe, I have integrated a quick bi-annual maintenance routine into my schedule. First, I use a non-contact infrared thermometer to check the temperature of my breaker while the car is charging at full speed. If you want to know what to look out for, read about why your EV breaker runs warmer than other circuits so you can tell the difference between normal operation and a dangerous hot spot. Additionally, I use a high-quality electronic contact cleaner to occasionally blow out any dust or debris from the vehicle plug connector. Learning how to clean your charger ports without damaging them is an incredibly simple way to prevent high resistance and local overheating.
As we look to the future, the way we interact with our home electrical grids is changing rapidly. We are moving away from simple one-way power delivery toward highly integrated home energy ecosystems. In fact, technical documentation from the Society of Automotive Engineers (SAE) indicates that bi-directional charging standards are rapidly maturing. Soon, your vehicle won’t just draw power; it will act as a peak-shaving battery generator for your entire house during grid outages. To prepare for this shift, smart homeowners are already checking out the truth about bi-directional charging and your home panel to ensure their infrastructure can handle two-way power flow when the technology becomes mainstream.
If you are currently experiencing any strange glitches, dropouts, or warm breakers, do not ignore them. I highly recommend running a quick terminal torque check this weekend or lowering your charging amperage by just 20% in your app to see if your system runs cooler. It is a simple, zero-cost adjustment that immediately reduces stress on your home’s electrical heart.
When I first started detailing my EV charging journey, I assumed that passing an electrical inspection was just a matter of following a basic checklist. I believed, like many others, that if the charger powered on and the car accepted the charge, the system was completely safe. But as I dug deeper into local electrical codes and chatted with seasoned inspectors, I realized how wrong I was. There is a massive disconnect between a charger that simply works and one that is fully code-compliant and structurally safe for your home.
Why is a panel upgrade not always the best first step?
Everyone in the EV forums will tell you that if you have a 100-amp panel, you absolutely must spend thousands of dollars on a full service upgrade before installing a Level 2 charger. However, in my experience, rushing into a massive utility service change is often an expensive and unnecessary trap. Many homeowners overlook modern load management systems that can dynamically pause your car’s charging session when your electric oven or clothes dryer kicks on. Understanding how load management modules prevent expensive panel upgrades can save you a fortune while keeping your existing system perfectly safe and compliant with the National Electrical Code (NEC).
According to safety reports from the National Fire Protection Association, the vast majority of residential electrical failures stem not from capacity limits, but from improper installation and poor terminations. This brings us to the ultimate installation mistake: ignoring the physical stress on your wires. I have seen DIYers pull cheap, undersized Romex through tight spaces, completely unaware of how much heat builds up during an eight-hour charging cycle. If you are planning your own installation layout, make sure you know the wire gauge mistake that fails 40 percent of inspections to keep your home safe and avoid costly redos.
Another common compliance pitfall involves the outdoor environment. If you mount your charger on an exterior wall or near a carport, the physical installation standards change dramatically. Many people do not realize that standard indoor safety switches do not cut it when moisture enters the equation. For example, understanding why your outdoor charger needs a specific type of GFCI protection is critical to preventing nuisance trips during heavy downpours. Even a minor oversight in conduit depth or grounding electrode connection can void your vehicle’s warranty and leave you with a massive troubleshooting headache. Have you ever fallen into this trap or had an inspector flag something unexpected? Let me know in the comments below so we can keep the conversation going.
Once you navigate the complexities of permits and wire gauges, you enter the long-term ownership phase. This is where many EV owners let their guard down. They assume that because the system is safe today, it will remain pristine forever. However, a Level 2 charger pulls massive continuous current week after week, creating ongoing thermal expansion and contraction cycles that can slowly loosen physical terminals over time.
How do I maintain my EV charging system over time?
To keep my garage safe, I have integrated a quick bi-annual maintenance routine into my schedule. First, I use a non-contact infrared thermometer to check the temperature of my breaker while the car is charging at full speed. If you want to know what to look out for, read about why your EV breaker runs warmer than other circuits so you can tell the difference between normal operation and a dangerous hot spot. Additionally, I use a high-quality electronic contact cleaner to occasionally blow out any dust or debris from the vehicle plug connector. Learning how to clean your charger ports without damaging them is an incredibly simple way to prevent high resistance and local overheating.
As we look to the future, the way we interact with our home electrical grids is changing rapidly. We are moving away from simple one-way power delivery toward highly integrated home energy ecosystems. In fact, technical documentation from the Society of Automotive Engineers (SAE) indicates that bi-directional charging standards are rapidly maturing. Soon, your vehicle won’t just draw power; it will act as a peak-shaving battery generator for your entire house during grid outages. To prepare for this shift, smart homeowners are already checking out the truth about bi-directional charging and your home panel to ensure their infrastructure can handle two-way power flow when the technology becomes mainstream.
If you are currently experiencing any strange glitches, dropouts, or warm breakers, do not ignore them. I highly recommend running a quick terminal torque check this weekend or lowering your charging amperage by just 20% in your app to see if your system runs cooler. It is a simple, zero-cost adjustment that immediately reduces stress on your home’s electrical heart.
The Hardest Lesson I Learned About EV Infrastructure
When I first installed my Level 2 charger, I assumed compliance was just about satisfying a city inspector to check a box. The reality is that code compliance is literally the thin line keeping your garage wall from catching fire. My biggest lightbulb moment came when I realized that continuous thermal expansion is a silent killer; copper and aluminum wires expand and contract under heavy electrical loads, which naturally loosens screw terminals over several months. If you do not actively perform preventative troubleshooting of your EV charger, a perfectly secure installation today can easily become a high-resistance fire hazard next season.
The Smart Tools I Rely On Every Month
I do not expect you to manage your home power grid blindly, which is why I recommend keeping three simple tools in your garage. First, get a basic infrared thermal gun to scan your breakers under load; it is the easiest way to catch loose connections before you smell hot plastic. Second, always refer directly to the official National Electrical Code (NEC) guidelines or trust resources like the Electric Safety Foundation International (ESFI) rather than random forum threads. Lastly, before you commit to heavy physical upgrades, consult with local experts who specialize in modern panel upgrades for EV chargers to explore dynamic load management instead of blindly paying for a 200-amp service replacement.
Take Control of Your Garage Safety Today
It is incredibly easy to feel overwhelmed by electrical calculations, conduit paths, and breaker ratings, but taking small steps today will save you thousands of dollars down the road. You do not need to be a certified electrician to drop your charger’s amperage in its app tonight or to double-check your permits. Ensuring complete code compliance for your EV charger installation is simply the smartest way to protect your physical home, your high-tech vehicle, and your family.
Have you ever noticed your home lights flickering or your garage electrical panel feeling unusually warm when you plug your electric vehicle in? Let me know in the comments section below!