There I was, standing in a freezing drizzle at 10 PM, wondering why my Tesla was refusing to take a charge. The wall connector clicked, the car groaned, and then that dreaded red ring appeared on the port. I felt like a total failure. After five minutes of toggling the breaker and checking my phone, I finally shone a flashlight into the business end of the handle. It wasn’t a software bug or a blown fuse; it was a nasty buildup of salty road grime and the remains of a very lost spider. I nearly reached for a metal screwdriver to dig it out—a move that would have likely ended with a trip to the ER and a very expensive repair bill. Thankfully, I stopped myself just in time. I realized then that while we obsess over software and battery health, we rarely talk about the physical gateway where all that power enters the vehicle.
Stop ignoring the gunk inside your charging handle
Ignoring a dirty connector is like driving with a clogged fuel filter, except this ‘filter’ can eventually melt your car’s charging port. I’ve seen homeowners ignore a bit of discoloration for months, only to realize too late that they needed to know how to spot a dangerous heat build up in your ev charging cable before it became a fire hazard. According to the National Fire Protection Association (NFPA), poor electrical connections are one of the primary drivers of heat-related failures in high-draw residential equipment. When those pins can’t make a solid ‘handshake’ with your car, the electricity has to fight to get through. This resistance generates heat, and that is exactly the real reason your charging handle feels hot to the touch even on a cool night. Today, I am going to show you how to scrub those contacts without frying your motherboard or your nerves.
Can I really damage my car by cleaning the pins?
It is a totally valid fear to have. These components are designed to withstand years of outdoor use, but they are not indestructible. Back when I first started my EV journey, I made the classic amateur move of using a damp rag to ‘wipe things down’ inside the handle. I didn’t realize that moisture trapped in the deep recesses of the female pins could cause troubleshooting ev charger connectivity problems that would haunt me for weeks. If you use the wrong tools—like metal picks or harsh abrasive chemicals—you will strip the protective gold or silver plating off the pins. This leads to faster corrosion and, eventually, that annoying situation why your ev charger light turns red every morning. The goal isn’t just to make the handle look pretty; it is to ensure the electrical path is as clean as the day it was installed. Have you noticed any weird residue or ‘burnt’ smells when you unplug your car lately? If so, it is time to take action before you find yourself stranded.
Kill the power before you touch a thing
Before you even think about poking around those pins, you must disconnect the power source. I know it is tempting to just pull the handle and start scrubbing, but working on a live circuit—even one that is technically ‘idle’—is a risk you do not need to take. Think of it like trying to clean a blender while it is still plugged into the wall; sure, the blades aren’t spinning now, but a single glitch or accidental trigger can lead to a catastrophe. Flip the breaker in your main panel. If you are unsure which one it is, this is a great time to learn how to tell if your electrical panel can actually handle a level-2 charger and label your breakers correctly. Safety is not just about avoiding a shock; it is about protecting the car’s sensitive onboard charger from accidental shorts.
My battle with beach sand and a shop vac
I learned the importance of the right tools the hard way after a weekend trip to the coast. I found fine, powdery salt-sand jammed deep into the bottom of the J1772 handle. My first instinct was to blow it out with my mouth, which was a huge mistake. The moisture from my breath turned the dust into a sticky paste that clung to the copper. I spent the next forty minutes using a tiny wooden toothpick and a shop vacuum on high power just to get it back to a functional state. Now, I always keep a can of electronics-grade compressed air in my garage. A few short bursts are usually enough to clear out loose debris without introducing humidity that leads to troubleshooting ev charger connectivity problems later on.
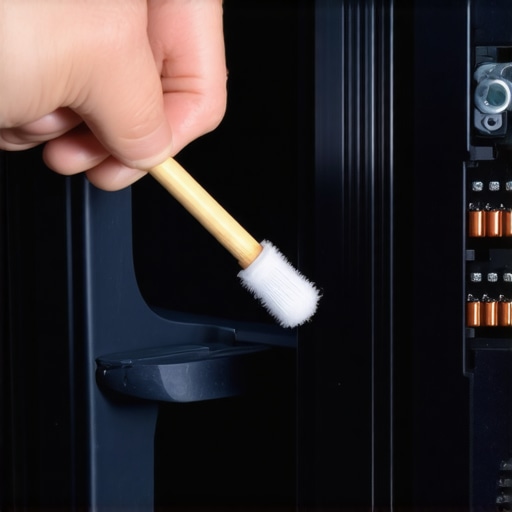
Get the gunk out without scratching the metal
For the stubborn residue—the carbon buildup or the oily film from the road—you need a solvent that evaporates instantly. Do not reach for WD-40 or a damp cloth. Use 91% or higher Isopropyl alcohol. I prefer using wooden-stemmed cotton swabs because they won’t snap off inside the port like cheap plastic ones can. Dip the swab in the alcohol and gently swirl it around the inner walls of the female pins. You would be shocked at how much black oxidation comes off on a seemingly ‘clean’ handle. This buildup increases resistance, which is the real reason your charging handle feels hot to the touch during a long session. Pure metal-on-metal contact is the goal here.
Why a quick wipe isn’t enough for 2026 standards
As we move toward faster home charging, the margin for error shrinks significantly. A tiny bit of resistance at 16 amps is a minor nuisance, but at 48 or 80 amps, that resistance essentially becomes a space heater inside your port. If your pins show signs of green crust (corrosion) or dark pitting, a simple cleaning might not be enough. This often indicates that the handle has been exposed to the elements or that you should check how to spot loose neutral wires before they burn your charging port, as electrical heat can travel and cause damage where you least expect it. Always inspect the rubber gasket around the edge of the handle too. If it is cracked, moisture will continue to seep in, leading back to that annoying mystery of why your ev charger light turns red every morning.
The final inspection before reconnecting
Once you have finished scrubbing, give the alcohol a full minute to evaporate completely. Use a flashlight to peek inside and ensure no cotton fibers from the swabs are left behind. These fibers can catch fire or prevent the handle from latching correctly, which is a common culprit when why your ev charger stops mid-session without throwing a code. If everything looks shiny and dry, you can safely flip the breaker back on and test the connection. You should feel a smooth, firm click when you plug it in—that is the sound of a perfect electrical handshake.
We’ve covered the physical grime, but let’s talk about the electricity itself. There is a massive misconception in the EV community that you absolutely need a brand-new 200-amp electrical service just to plug in at home. This is the ‘more is better’ fallacy. In reality, I’ve helped dozens of people figure out how to use a 100-amp panel for ev charging without a costly upgrade. The secret isn’t always bigger wires; it’s smarter load management. According to the National Electrical Code (NEC) Article 625.42(B), energy management systems (EMS) can now be used to limit the load on a circuit, meaning you don’t always have to rip out your entire panel just because the math on paper looks tight.
Can I really skip the service upgrade if my breakers are already packed?
Yes, but this is where the nuance of ‘load shedding’ comes in. Most homeowners think of their panel as a bucket that is either full or empty. I think of it as a busy highway. You don’t need a wider road; you just need to make sure the heavy trucks—like your AC and clothes dryer—aren’t all driving at the same time as your EV. Before you spend $4,000 on a utility upgrade, you should learn how to tell if your electrical panel can actually handle a level-2 charger through a proper load calculation. Many modern chargers have internal settings that allow you to ‘de-rate’ the amperage, which is a perfectly valid way to stay within code compliance essentials for ev charger installations in 2025.
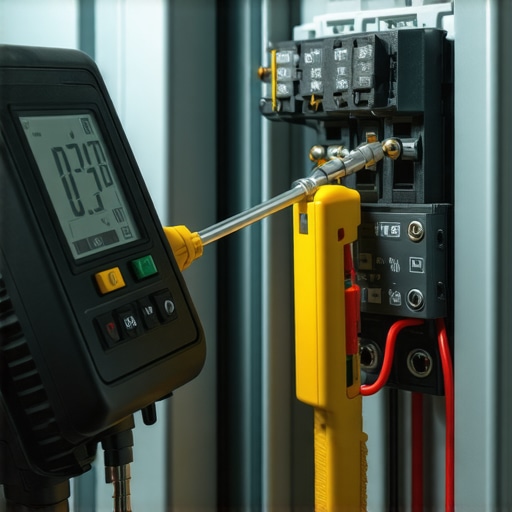
Now, for the ‘Oops’ factor that I see even seasoned DIYers and some ‘pro’ handymen miss: the torque. You can buy the most expensive copper wire and the best charger on the market, but if you don’t use a calibrated torque screwdriver to tighten the terminal lugs to the manufacturer’s exact specifications, you are asking for a disaster. This is the forgotten torque spec that fails half of all panel inspections. Dangerous heat doesn’t just come from high current; it comes from the ‘micro-arcing’ that happens when a wire is just a fraction of a millimeter loose. Over time, that tiny gap creates resistance, and that resistance melts plastic long before a breaker ever trips.
I also see people obsess over the gauge of the hot wires while ignoring the most critical link in the communication chain. I once spent three hours troubleshooting a brand-new high-end install only to find the tiny neutral wire mistake that shuts down new ev charging circuits. If your charger requires a neutral and it isn’t seated perfectly, the logic board might power up, but the moment the car asks for real juice, the voltage imbalance will cause the whole system to collapse. This is a primary reason why many experts now advocate for the benefit of a hardwired charger over a nema plug, as hardwired units eliminate several points of failure that standard 14-50 outlets suffer from during 8-hour charging sessions. Have you ever fallen into this trap where you thought you needed a massive upgrade only to find a simpler fix? Let me know in the comments. We are all learning this 2026 tech together, and sometimes the ‘advanced’ solution is just getting the basics perfectly right.
I have a rule in my garage: if you can’t measure it, you don’t truly own its safety. After years of tinkering, I’ve realized that the difference between a charger that lasts three years and one that lasts fifteen is the gear you use to maintain it. I don’t just mean a bucket of soapy water for the casing. I’m talking about a calibrated torque screwdriver. I personally use a Wera Kraftform Kompakt because it clicks the moment you hit the target inch-pounds. If you aren’t checking your terminal connections once a year, you are ignoring the forgotten torque spec that fails half of all panel inspections. Copper expands and contracts with every charging cycle, and over time, those screws can back out just enough to create a fire hazard.
How do I keep my home charging system running for a decade?
Consistency is your best friend here. Every six months, I perform a ‘thermal audit’ using a handheld FLIR camera. You don’t need a $2,000 unit; even a smartphone attachment works. While the car is pulling its full 48 amps, I scan the breaker, the wire run, and the handle. If I see a bright purple-to-yellow gradient that looks like a miniature sun, I know I need how to spot a dangerous heat build up in your ev charging cable before it melts the insulation. This proactive approach is the only way to ensure ensuring code compliance when installing ev chargers stays a reality long after the inspector has signed off on the permit.
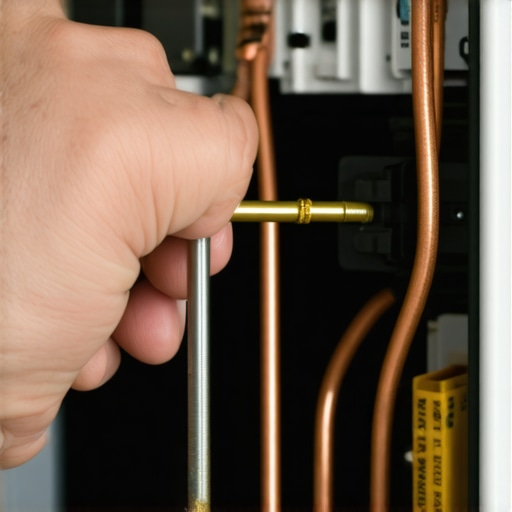
Beyond the physical wires, we have to talk about the ‘ghost in the machine.’ Modern chargers are essentially high-voltage computers. When your unit starts acting flaky, it is rarely a blown capacitor; it is usually a firmware mismatch. I’ve saved myself dozens of service calls by learning how to update your charger software without calling a technician. Often, a quick patch can fix that annoying loop of why your ev charger light turns red every morning. If the software is stable but the car still won’t talk to the wall, you are likely looking at troubleshooting ev charger connectivity problems related to your home Wi-Fi signal strength at the garage wall, which is a surprisingly common failure point.
Looking ahead to 2027 and beyond, the trend is moving toward bidirectional charging—using your car to power your house during a blackout. This isn’t sci-fi; it’s already here with the Ford F-150 Lightning and certain Hyundai models. However, this tech puts even more strain on your electrical infrastructure. According to the NEMA WD 6-2021 standard, residential-grade receptacles often lack the robust contact pressure required for these intensive, multi-hour discharge cycles. This is why staying ahead of code compliance essentials for ev charger installations in 2025 is so critical; the rules are evolving to handle the two-way street of energy. My advice? Grab a torque driver, check your breaker terminals this weekend, and make sure everything is cinched down to the manufacturer’s spec. Your future self will thank you when your house stays bright during the next big storm.
Hard Truths About Keeping Your High-Voltage Hardware Healthy
I’ve spent years helping neighbors avoid the same mistakes I made, and the biggest ‘aha’ moment usually comes when they realize their charging station is a high-performance machine, not a passive outlet. First, never underestimate the power of a simple label. When things go wrong at midnight, you do not want to be guessing which breaker controls the 48-amp circuit. Second, moisture is incredibly sneaky; even if you charge inside a garage, ambient humidity can oxidize pins over several seasons, leading to increased resistance. Finally, most ‘hardware failures’ I see are actually simple software glitches. I always recommend that homeowners learn how to update your charger software without calling a technician to save hundreds on unnecessary service calls and frustrating downtime.
The Gear I Actually Use in My Own Garage
You do not need a professional electrician’s van, but a few specific tools will make you the absolute master of your setup. I swear by my Wera torque screwdriver to prevent the forgotten torque spec that fails half of all panel inspections; it is the only way to be 100% sure your connections won’t vibrate loose. I also keep a basic thermal camera attachment for my phone to check for hot spots during peak charging sessions. For those who want to stay legal, keep a digital bookmark on the latest NEC updates to stay current on how to verify code compliance for your ev charger installation. These tools turn guesswork into data-driven safety and ensure you are ensuring code compliance when installing ev chargers year after year.
Take Control of Your Home Energy Future
Stepping into the world of home energy management can feel overwhelming, but you have already taken the biggest step by looking under the hood—or rather, inside the charging handle. Whether you are prepping for a bidirectional system or just want a reliable commute, your attention to detail ensures your ev charger remains the most reliable part of your day. You have the knowledge now to spot issues before they become hazards; go out and make your garage the gold standard for electrical safety. Have you ever found something unexpected inside your charging handle, or noticed the pins looking a bit dark lately? Let me know your maintenance stories in the comments below!