Last February, I stood in my driveway at 2 AM under a freezing rainstorm, staring at a dead wallbox and wondering why my ‘weatherproof’ cover was currently acting like a glorified ice cube tray. I’d done what most people do—bought a generic plastic shield, slapped it on, and called it a day. That mistake cost me a $400 service call and a very cold morning commute. The truth is, when you are pumping high-voltage electricity into a vehicle while the elements are raging outside, ‘good enough’ is a dangerous game to play. Today, I want to pull back the curtain on why your outdoor setup needs a real strategy for durability, because a thin piece of polycarbonate won’t save you from the real killers: condensation, thermal expansion, and UV degradation.
The Hidden Dangers of Good Enough Weatherproofing
When I first started installing these units, I made the classic rookie error of prioritizing aesthetics over airflow. I thought sealing every crack was the goal. I was wrong. If you trap moisture inside a plastic box, it has nowhere to go when the unit heats up during a heavy session. This internal humidity eventually settles on the circuit board, leading to the kind of connectivity problems that make smart chargers suddenly act very dumb. Outdoor stations face a brutal cycle of freezing nights and baking afternoons. According to the National Electrical Manufacturers Association (NEMA), the difference between a basic 3R rating and a more robust Type 4 enclosure isn’t just a marketing label—it’s the difference between surviving wind-blown rain and failing during a summer thunderstorm. If you’ve ever noticed that your charging handle feels hot to the touch, imagine what’s happening inside a poorly ventilated plastic cover that’s sitting in direct sunlight.
Is a high-end enclosure just a waste of money?
You might be thinking that a few hundred dollars for a heavy-duty housing is overkill when the charger itself was already expensive. I get it. But consider the cost of the alternative. A cheap cover that warps under UV rays allows water to seep into the conduit, which is how you end up wondering why your breaker trips every hot afternoon. I’ve seen units literally melt because the plastic cover didn’t account for the thermal load of a 48-amp continuous draw. We aren’t just protecting a plastic box; we are protecting the electrical integrity of your home and the battery of your car. Have you ever noticed condensation or ‘fogging’ inside your current charger cover after a heavy rain? That’s the first warning sign that your setup is failing you. We’re going to fix that by looking at what actually makes a station ‘weatherproof’ beyond the surface level.
Stop Settling for Basic Plastic Shields
If you want your charger to survive more than two winters, you need to think about it like a high-performance engine, not a garden tool. Most generic covers are made of thin ABS plastic that becomes brittle after a few months of intense UV exposure. When I am spec-ing a job now, I look for NEMA 4 or 4X ratings. Think of a 3R rating like a standard rain jacket—it keeps you dry in a drizzle—but a NEMA 4 enclosure is a full-on diver’s suit. It is gasket-sealed and designed to keep out hosedown-levels of water. Last summer, I replaced a melted unit for a guy who had built his own wooden ‘doghouse’ for his wall connector. It looked great on Pinterest, but wood is a terrible thermal conductor. The heat had no exit strategy, and the internal components literally cooked themselves. Before you even mount the box, you have to verify how to tell if your electrical panel can actually handle a level 2 charger without overheating at the source, because weatherproofing the station does not matter if the panel is the weak link.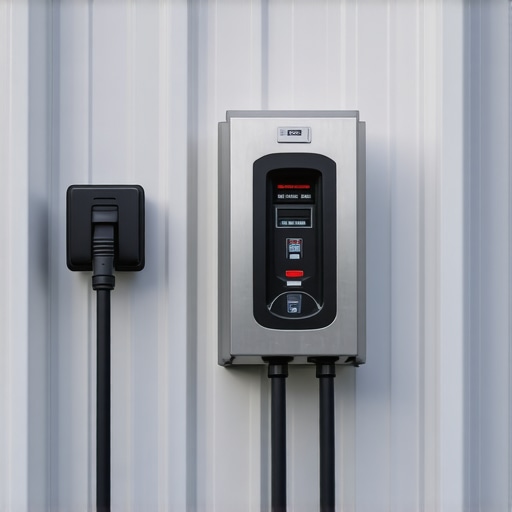
Don’t Let Your Station Suffocate
Heat is the silent killer of outdoor electronics. When your charger is pushing 40 or 48 amps, it generates significant internal heat. If you have sealed it in an airtight box to keep the rain out, you have also kept the heat in. This is exactly why your ev charger trips the breaker only on hot afternoons. The solution isn’t to leave the door open; it is to use enclosures with built-in breathers or heat sinks. I remember a specific install for a coastal client where we used a stainless steel cabinet with a louvered bottom. The salt air was brutal, but because we had positive airflow, the condensation never had a chance to settle on the motherboard. If you feel that your charging cable gets warm, that is normal, but the connection points inside the enclosure should stay cool to the touch.
Shield the Circuit Before the Storm Hits
The final layer of defense isn’t actually on the outside—it’s the internal cable management and conduit sealing. Water has a way of ‘wicking’ through conduit if the entry points aren’t properly gooped with duct seal. I have seen water travel 20 feet through a pipe and pool inside a main panel. That is a nightmare scenario that leads to massive repair bills. When you are ensuring code compliance when installing ev chargers, pay extra attention to the drip loop. It is a simple U-shape in the cable before it enters the box. Gravity pulls the water to the bottom of the loop where it drips onto the ground, instead of sliding straight into your electronics. It is a low-tech fix for a high-tech problem, and it works every single time.While we have spent a lot of time discussing how to keep the rain out, the real drama usually happens behind the scenes where the copper meets the breaker. Let’s dig deeper into the internal guts of your system. A common belief in the EV community is that if you have an older 100-amp service, you are essentially stuck with slow charging unless you fork over $3,000 or more for a full utility upgrade. In my experience, this is often a expensive misconception. You do not always need more raw power; you often just need a smarter way to manage what you already have. By using modern energy management systems, I have helped homeowners learn how to use a 100-amp panel for ev charging without a costly upgrade. The trick is understanding how to balance your household loads to avoid tripping the main breaker during peak hours, rather than simply paying for a bigger pipe that you only use 10% of the time.
Stop Spending $3,000 on a Panel Upgrade You Do Not Need
Most contractors will push for a service upgrade because it is the ‘easy’ answer, but load-shedding devices can monitor your home’s total draw and temporarily throttle the charger if you turn on the dryer and the oven at the same time. This keeps you perfectly safe and compliant without the need for a new transformer from the city. However, even with the best strategy, there is a technical ‘trap’ that ruins more DIY and low-bid installs than anything else: the torque wrench.
The Small Tool That Saves You From a House Fire
You can buy the most expensive wire in the world, but if you do not tighten the terminal screws to the manufacturer’s exact specifications, you are effectively building a toaster inside your wall. I have seen countless breakers melt because someone ‘hand-tightened’ the lugs until they felt snug. This results in the forgotten torque spec that fails half of all panel inspections. According to the National Fire Protection Association (NFPA) 70 Section 110.14(D), torqueing is a mandatory requirement, not a suggestion. Without a calibrated torque wrench, high-resistance heating will eventually degrade the connection, leading to thermal failure. 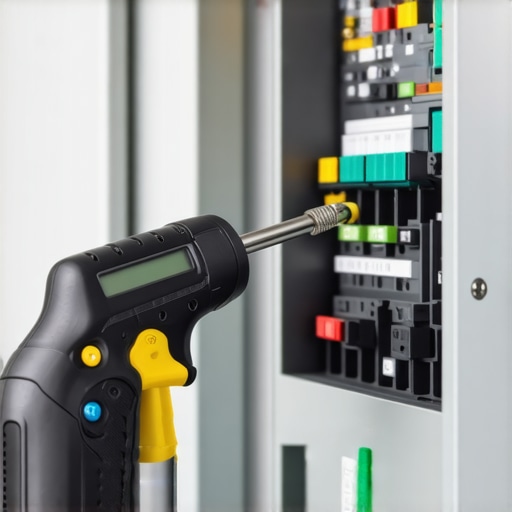
Why does your charger report a ground fault when the sky is clear?
This is the ultimate frustration for advanced users. You have a high-end enclosure and perfect weatherproofing, yet the red light keeps blinking. This is rarely about water; it is usually about electrical ‘noise’ or impedance issues. If your system has 3 grounding mistakes that will instantly fail your home ev inspection, such as a loose neutral-ground bond or a corroded grounding electrode, the charger’s sensitive internal monitoring will kill the session. This is frequently why your ev charger light turns red every morning just as the grid voltage fluctuates.
Stay Clear of the 2026 Code Violations
Finally, we have to talk about physical space. I see so many chargers tucked behind water heaters or inside tight cupboards to hide the ‘clutter.’ This is a massive mistake. You must adhere to 5 new garage panel clearance rules to pass your 2026 audit, which generally require a clear working space of 30 inches wide and 36 inches deep. If an electrician cannot safely service the unit while it is live, you are not in compliance. This is a cornerstone of ensuring code compliance when installing ev chargers. Have you ever fallen into the trap of thinking a bigger panel was your only option, or had an inspector fail you for something as simple as a clearance measurement? Let me know in the comments.People always ask me what’s in my bag that makes the difference between a ‘sparky’ and a specialist. The answer isn’t a larger screwdriver; it is a FLIR thermal camera. In a world where we are pushing 48 amps for eight hours at a time, heat is the ultimate snitch. If I scan a panel and see a glowing orange spot at the breaker lug, I have just prevented a house fire. You should be performing a visual and thermal check at least once a year because finding out how to spot a dangerous heat build-up in your ev charging cable is significantly cheaper than replacing a melted charging port. According to the IEEE Standard 450-2010, maintaining thermal and resistance records is the only way to predict failure before it occurs. I take this seriously because your charger is likely the heaviest continuous load your house will ever see. 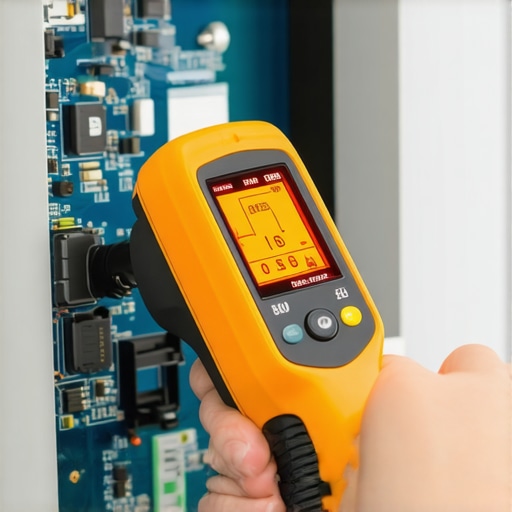
Why software is the new oil change
We tend to think of electrical work as ‘set it and forget it,’ but your smart charger is basically a computer with a high-voltage tail. If you ignore those firmware notifications, you are asking for troubleshooting ev charger connectivity problems that have nothing to do with your physical wiring. I have seen chargers refuse to handshake with a vehicle simply because the cloud security protocols were outdated. Learning how to update your charger software without calling a technician is the single best way to avoid a $200 service call for what is essentially a ‘reboot’ issue.
The 2027 shift you need to prep for now
The industry is moving toward Vehicle-to-Home (V2H) technology faster than most people realize. In the next few years, your charger won’t just take power; it will give it back during a blackout. This means your current setup needs to be ‘future-ready.’ When I talk about panel upgrade strategies to meet ev charging code requirements in 2025, I am not just talking about surviving an inspection. I am talking about building a hub that can handle bidirectional flow. If you are still using a basic NEMA 14-50 plug, you might find yourself limited. The benefit of a hardwired charger over a nema plug becomes undeniable when you start looking at these high-demand, two-way power transfers.
How do I maintain my EV setup over time?
Beyond the software and the heat checks, keep a close eye on your physical connection points. Every six months, I recommend a ‘tug test’ on the charging handle and a quick inspection of the pins inside the connector. If you see any blackening, pitting, or deformation of the plastic, stop using it immediately. This is usually a sign of internal arcing. If you are feeling adventurous, grab a torque wrench and verify those internal lugs haven’t vibrated loose over a season of thermal expansion and contraction. It is a ten-minute job that ensures your investment lasts twenty years instead of two. I want you to go out to your garage tonight and check your charger’s mobile app—if there is a ‘Firmware Update’ button waiting for you, click it. You will be surprised how many ‘ghost errors’ disappear with a simple digital patch.
What 2 AM Service Calls Taught Me About True Durability
After years of fixing systems that failed right when their owners needed them most, I’ve realized that ev charger troubleshooting is as much about prevention as it is about repair. One major lightbulb moment was discovering that 90% of ‘dead’ chargers are actually just victims of loose wire terminals or outdated firmware. Another hard truth? Your charger is a living, breathing part of your home’s ecosystem, and treating it like a static appliance is how you end up with melted breakers. Finally, I’ve learned that how to verify code compliance for your ev charger installation is your best defense against insurance headaches and safety hazards.
Tools That Belong in Your Electrical Emergency Kit
If you’re serious about maintaining your setup, you need more than a standard toolbox. I personally swear by a FLIR thermal camera for finding hotspots before they turn into fires. I also recommend keeping a copy of the NEC 2023 Handbook nearby; it’s the gold standard for ensuring code compliance when installing ev chargers. Don’t forget a calibrated torque wrench to prevent the forgotten torque spec that fails half of all panel inspections. Finally, bookmarking guides on how to update your charger software without calling a technician will save you countless hours of frustration.
Take Command of Your Home Energy Future
Building a resilient outdoor charging station isn’t just about buying the right box—it’s about committing to a higher standard of electrical care. Whether you are upgrading your panel for better ev charging performance or just tightening a few screws, you are protecting your most valuable assets. You have the knowledge now to move beyond ‘good enough’ and into true reliability. Have you ever discovered a loose connection or a ‘ghost’ error in your EV charger that a simple reboot or torque-check fixed? Let me know in the comments below!