It was 11:30 PM, the rain was drumming a steady, annoying beat on my garage roof, and all I wanted to do was plug in my Model Y and go to sleep. Instead, I was greeted by a pulsing, angry red light staring back at me from my Tesla Wall Connector. Four distinct, rhythmic flashes. No green stream of energy, just a dead car and a spiking heart rate. I stood there in my slippers, completely baffled. In my early days as an EV enthusiast, I made the classic rookie mistake of ignoring the technical manual’s wiring specs, thinking any standard setup would do. That stubbornness cost me hours of late-night head-scratching.
The Annoying Reality of the Four-Red-Flashes Error
When your charger decides to throw a tantrum, it is not just trying to ruin your night. It is actively protecting your home and your car from a potentially hazardous electrical failure. In the Tesla ecosystem, four red blinks indicate a critical over-temperature protection event. Essentially, your Wall Connector is screaming that things are getting way too hot inside the unit or at the terminal block. This is not a glitch you should simply ignore or force-restart; it is a serious warning that requires immediate troubleshooting.
Today, we are going to get to the absolute bottom of this issue. We will cover exactly why this heat buildup happens, how to safely inspect your unit, and how to get your daily charging speeds back to normal without calling an expensive emergency technician. For many homeowners, a flashing red light points to deeper infrastructure issues, such as why you might need a panel upgrade for better EV charging performance to prevent your system from running dangerously hot.
Is this blinking light actually a sign of a fire hazard?
It absolutely can be. According to safety data compiled by the National Fire Protection Association (NFPA), poor electrical connections and improper wire termination represent the leading causes of residential electrical fires. When those terminals inside your charger are not tightened to the exact millimeter or torque specification, they create high resistance. High resistance under a continuous 48-amp load acts exactly like a toaster heating element. Over time, that heat melts casing, destroys delicate internal sensors, and eventually triggers the thermal shutdown. I learned this the hard way when I discovered my own terminal screws had slowly vibrated loose over a year of heavy use, leading to my first terrifying encounter with the four-red-flashes warning.
Have you ever walked out to your garage only to find your charger blinking red and your battery completely drained? Let me know in the comments below, or reach out if you are currently stuck in this exact loop. Often, solving this issue permanently requires addressing the wire gauge mistake that fails forty percent of inspections, ensuring your wiring can actually handle the continuous thermal load of a modern electric vehicle.
Step-by-Step Diagnostic Process for High Thermal Resistance
To stop your charger from overheating, you have to treat it like a high-performance engine. If there is any friction or resistance in the system, heat builds up rapidly. When resolving the four-red-flashes error, we need to inspect the physical contact points where electricity enters the unit. Even a microscopic gap between the copper wire and the terminal block acts as a bottleneck, forcing electrons to squeeze through a tiny space, which spikes the temperature within minutes of starting a 48-amp session.
Power Down and Secure the Circuit Safely
Before you even think about grabbing a screwdriver, go to your main breaker panel and flip the dedicated breaker for your charger to the off position. Never rely solely on the app telling you the car is not charging. I remember a chaotic Tuesday night when I rushed this step, assumed the line was dead, and got a nasty spark that singed my thumb because I had switched off the wrong double-pole breaker. Verify the power is truly off by using a non-contact voltage tester on the unit before removing the outer cover.
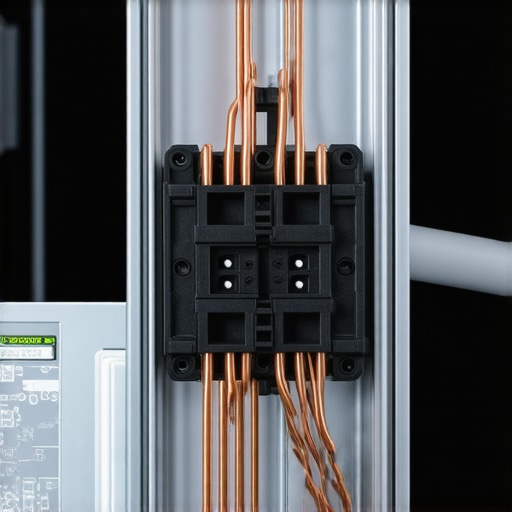
Inspect the Terminal Block for Melting and Discoloration
Remove the outer cosmetic cover and the inner wire guide. Look closely at the terminal block where the service wires connect. If you see deformed plastic, black soot, or rainbow-colored discoloration on the copper wiring, you have found your culprit. This damage indicates extreme heat buildup. When this occurs, simply tightening the screws will not fix the underlying issue; you must strip back the damaged, oxidized copper wire to reveal fresh, clean metal and replace the damaged terminal block entirely to restore proper conductivity.
Apply the Correct Torque and Check Your Wire Type
Hand-tightening with a standard screwdriver is the quickest way to trigger another thermal shutdown. Tesla specifies an exact torque rating of 50 lb-in (5.6 Nm) for the Wall Connector terminal screws. Use a calibrated torque screwdriver to tighten these connections. During my second attempt at fixing my setup, I realized my installer had skipped this check. Applying the correct torque solved my recurring error code instantly. Additionally, ensure you are not dealing with a poor installation job. Check if your electrician used solid or stranded wire, as understanding why solid copper wire beats stranded for heavy duty ev circuits can make a massive difference in long-term thermal performance under continuous load.
Ensure Your Circuit Breaker is Running Cool
Sometimes the heat does not originate inside the charger housing itself, but transfers through the conduit from a struggling breaker panel. If your main panel is crowded or outdated, the breaker itself will run incredibly hot. You can learn more about why your ev breaker runs warmer than other circuits to determine if the heat signature is migrating down your line. To prevent this, always ensure your terminal connections are checked thoroughly, which is why the forgotten torque test that prevents panel fires is so critical for both the charger end and the breaker end of your dedicated circuit.
Everyone tells you to simply lower your charging amperage in the Tesla app when things get hot. It seems like the perfect, easy fix: dial it down from 48 amps to 32 amps, and the blinking red light disappears. But in my experience, treating the symptom instead of the cause is a dangerous trap. Lowering the current is just a temporary bandage that masks a deteriorating physical connection. If you have a loose terminal screw or mismatched wire, that connection is still degrading under load, just slightly slower. You are essentially hiding a fire hazard behind software settings.
Why does my charger still run hot even after lowering the charging current?
The answer lies in the physics of electrical resistance. According to research from the National Fire Protection Association (NFPA) on residential electrical failures, thermal degradation is a progressive issue. Once a copper wire has been subjected to extreme heat, it oxidizes. This oxide layer acts as an insulator, drastically increasing resistance. Even if you reduce the current to 32 or 24 amps, the compromised surface area cannot handle the load efficiently. The unit will eventually trigger another thermal shutdown because the damaged physical contact point acts as a localized heater.
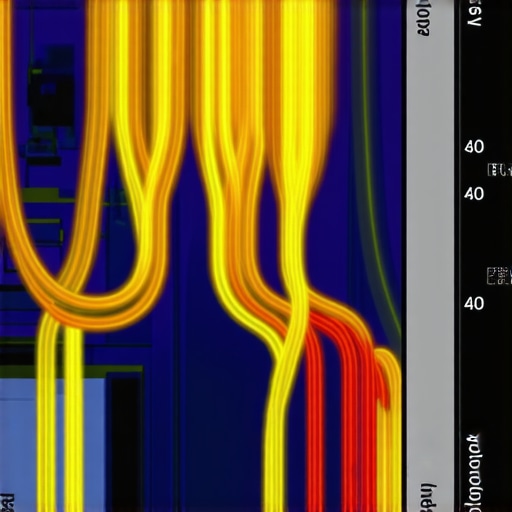
The real trap to avoid during a DIY rescue is ignoring how your system handles continuous load over several hours. Many homeowners install a charger, run it for ten minutes, see a green light, and assume the job is perfect. They completely miss the fact that thermal expansion takes time. It can take up to two hours of continuous draw for a poor connection to reach its peak temperature. To protect your home, you must look at the bigger picture and ensure your installation meets strict local regulations. Taking the time to verify code compliance for your ev charger installation is the only way to guarantee your family’s safety.
If you are struggling with recurring faults, the problem might stem from how your entire home system is configured. You can learn about troubleshooting ev chargers common compliance pitfalls and fixes to pinpoint exactly where your setup violates electrical standards. In many older homes, the main panel simply cannot sustain a continuous 48-amp draw without overheating, meaning you might need to research panel upgrades for ev chargers what you need to know before plugging your vehicle back in.
Have you ever fallen into this trap of lowering your amperage to temporarily bypass a thermal warning? Let me know in the comments below, or share your experience with getting your home panel inspected.
Once you have resolved the immediate thermal fault, your job is not quite done. Think of high-amperage home charging like running a heavy-duty industrial machine in your residential garage; it requires routine observation to keep operating safely. Over my years of driving electric, I have developed a simple, bi-annual maintenance routine that has completely eliminated surprise shutdowns. I do not wait for a red warning light to tell me there is a problem. Instead, I proactively inspect my setup to catch resistance before it turns into a thermal event.
How do I maintain my EV charger over time?
The secret to keeping your system flawless lies in two specialized tools: a professional-grade infrared thermal camera and a digital torque screwdriver. Every six months, I run a peak charging session for about thirty minutes, then scan my Wall Connector and main service panel with a FLIR thermal imager. This allows me to visually detect localized hot spots long before they trigger a system fault or cause physical damage. Additionally, copper wires naturally expand and contract under thermal cycles, which can cause terminal connections to back out over time. Utilizing the specific torque settings that prevent garage fires to re-verify the tension on your terminals annually is the ultimate insurance policy for your home.
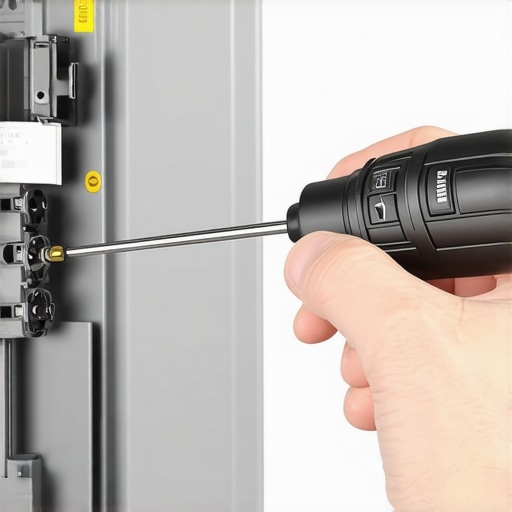
As we look toward the future of residential energy, the demands on our home grids are only going to increase. With the rise of larger battery packs and vehicle-to-home backup systems, our electrical infrastructure will be pushed to its absolute limits. If you are already experiencing minor thermal issues on a basic setup, it is a clear sign that your system is struggling. Taking steps now to research panel upgrade strategies to meet EV charging code requirements in 2025 will position your home to handle these massive continuous loads without breaking a sweat or risking a fire.
According to the technical installation guidelines published by the International Association of Electrical Inspectors (IAEI), maintaining tight electrical termination integrity is the single most effective way to prevent long-term component degradation in continuous-duty circuits. I highly recommend grabbing a simple thermal imaging camera attachment for your smartphone this weekend and scanning your electrical panel while your car is drawing its maximum current. You might be surprised to see which breakers are running warmer than they should be.
What Experts Won’t Tell You About Continuous Thermal Loads
Most standard electrical installations are built for intermittent loads—appliances that cycle on and off. Charging an electric vehicle at 48 amps is a completely different beast, demanding peak capacity for six to ten hours straight. Over my years of troubleshooting, I have uncovered a few hard truths that many installers overlook.
- Software limitations are not safety shields: Relying on your vehicle app to lower the charging current to mask a heat issue is like turning down the radio to ignore an engine knock. The physical resistance inside your terminal block is still there, and it will continue to degrade.
- The thermal expansion cycle is real: Copper wires expand and contract as they heat up and cool down. This minor, repetitive movement can gradually back out even a tight terminal screw over a year or two, which is why annual torque maintenance is essential.
- Older home panels struggle with modern demands: If you are plugging a high-powered EV into a 100-amp or 125-amp service without checking your load calculations, your entire panel is running at its absolute limit. In these situations, you can explore panel upgrade strategies to meet EV charging code requirements in 2025 to keep your home safe.
My Essential Toolkit for EV Electrical Health
If you want to transition from reacting to emergency red blinking lights to proactively managing your home charging station, I highly recommend adding a few specialized tools to your garage kit.
- A Calibrated Torque Screwdriver: You cannot guess 50 lb-in of torque. Having a reliable digital torque screwdriver ensures your connections are tightened to exact manufacturer specifications, preventing the micro-gaps that cause rapid heat buildup.
- A Smartphone Infrared Camera Attachment: A compact FLIR or Seek Thermal camera is a game-changer. Scanning your wall unit and breaker box under full load lets you see localized hot spots long before they trigger a system fault or cause physical damage.
- A Non-Contact Voltage Tester: Never open your Wall Connector without verifying the line is completely dead. This cheap tool is your primary life insurance policy when performing basic physical inspections.
Take Control of Your Home Charging Safety
Dealing with charging faults can be incredibly frustrating, but solving them correctly ensures your home and family stay safe from electrical hazards. If your Tesla Wall Connector has started flashing red, take it as an invitation to inspect your infrastructure, verify your torque specs, and make sure your system is fully compliant. If your home grid is struggling to handle the thermal load, it might be time to investigate panel upgrades for ev chargers what you need to know before pushing your circuit to its limits again.
Have you ever experienced the frustrating four-red-flashes warning on your charger, or did you discover a loose terminal connection during your last inspection? Let me know in the comments below!