I’ll never forget the sound of my Level 2 charger hitting the concrete. It was 2 AM, and I thought I’d done a "good enough" job with those little plastic expansion anchors that came in the box. Big mistake. I woke up to find my expensive hardware dangling like a loose tooth, having ripped a jagged hole right through the paper and gypsum. It’s a gut-wrenching feeling seeing your investment—and your wall—trashed because you underestimated the sheer weight of a heavy-duty charging cable. I’d fallen into one of the most common DIY mistakes in home charger installations by treating a high-voltage appliance like a lightweight picture frame. If you are staring at a pristine piece of drywall wondering if it can really hold up that bulky charging station, you are right to be skeptical. Today, I’m going to share the exact methods I used to fix my mess, ensuring your charger stays rock-solid for years without a single crack in the plaster.
The Heavy Cable Problem You Can’t Ignore
Most people look at the charger unit itself and think, "That’s not so heavy." They forget about the 25-foot copper cable. When you are rushing to plug in after work, you aren’t always gentle. You tug, you pull, and you drape that heavy cord over the hook. That repetitive stress is what eventually kills your drywall. According to the Gypsum Association, standard half-inch drywall is primarily designed for aesthetic covering and fire resistance, not for supporting cantilevered, vibrating loads that are constantly handled. Without the right backing, you are essentially waiting for gravity to win. You need to consider the best height for a wall-mounted charger to avoid cord strain, as mounting it too high or too low often increases the leverage applied to those wall anchors every time you reach for the handle.
Is Drywall Actually Strong Enough for This?
I get asked this all the time: "Can I really trust a toggle bolt with my $600 Tesla or JuiceBox?" The honest answer is: only if you have no other choice, and even then, there’s a better way. In my early days, I tried to skip the stud finder because the "perfect" spot was three inches away from the wood. That laziness cost me a Saturday and a trip to the hardware store for patch kit supplies. Have you ever walked into your garage and noticed the charger looking just a tiny bit tilted? That’s the first sign the gypsum is failing behind the bracket. If you have ever dealt with a charger that feels "wiggly," tell me about it in the comments—I want to know I wasn’t the only one who learned this the hard way.
Find the Wood or Build the Base
The golden rule for mounting anything that draws high current and gets handled daily is to hit a stud. No excuses. However, garage studs aren’t always where we need them to be. Before you start drilling random holes, you should spend some time learning how to find the best spot in your garage for a level 2 install. If your heart is set on a spot between studs, we don’t just use bigger anchors; we use a mounting plate. By attaching a piece of finished plywood or a specialized mounting bracket across two studs, you create a bulletproof foundation for the charger. This ensures that the weight is distributed into the home’s framing rather than the fragile drywall skin. It’s the difference between a professional-looking setup and a disaster waiting to happen.
The Plywood Plate Trick for Total Stability
When the studs in your garage don’t line up with the pre-drilled holes on your charger, do not reach for the toggle bolts. Instead, go to the lumber yard and grab a piece of 3/4-inch birch plywood. I once spent three hours trying to "finesse" a Wallbox onto a crumbly piece of 1970s drywall using those massive butterfly anchors. It stayed for exactly three charges until my spouse accidentally yanked the cable while uncoiling it, and—thud—half the wall came with it. That was the day I started using a mounting plate for every single install.
By cutting a piece of plywood slightly larger than your charger and spanning it across two studs, you create a structural bridge. You screw the plywood into the studs with heavy-duty wood screws, and then you mount the charger to the plywood. This distributes the weight of that heavy copper cable across the framing of your house rather than a single point on the gypsum. It’s a professional-grade move that makes how to verify code compliance for your ev charger installation much simpler because the inspector can see the unit is physically secure.
Why Your Stud Finder is Your Best Friend
Finding the exact center of a stud is the difference between a secure mount and a screw that just grazes the edge of the wood, eventually stripping out. I use the "deep scan" mode and mark both edges of the stud before finding the center point. If you’re working in a finished garage, remember that you also need to account for the specific panel space requirements for a level 2 install before you commit to a mounting location. You don’t want to perfectly mount your charger only to realize you’re too far from the panel to run the conduit efficiently.
Dealing with the Electrical Load Behind the Wall
Once the physical mounting is sorted, the "how" shifts to the guts of the system. A Level 2 charger isn’t just a heavy box; it’s a massive electrical draw that generates heat. This is why you must ensure you are ensuring code compliance when installing ev chargers by using the right materials. For example, the heat generated by a 48-amp continuous draw requires specific wire sizes. You should double-check the exact gauge of wire you need for a 60 amp circuit to avoid a fire hazard behind that newly mounted wall plate. Think of the wire like a garden hose: if the hose is too small for the pressure, it’s going to burst—or in this case, melt.
How to Pass the Inspector’s Wiggle Test
Every electrical inspector I’ve ever met has a "wiggle test." They walk up to the charger and give it a firm tug. If there is any play, any creak, or any movement in the drywall, you’ve failed. To avoid this, use 2-inch lag bolts for the mounting plate and ensures your conduit is strapped every few feet. Following these physical steps is the best way how to pass your electrical inspection on the first visit. When everything feels like it’s part of the house’s foundation, the inspector knows you took the time to do it right rather than just doing it fast.
Everyone tells you that if you have an older home with 100-amp service, you are doomed to slow charging unless you shell out thousands for a full service upgrade. In my experience, that is often a myth pushed by contractors looking for a bigger payday. Before you sign that quote, you should look into how to load balance your home electrical system without a full panel swap. Modern energy management systems can pause your car’s charging if the dryer and oven kick on simultaneously, keeping you within the safety limits of your current hardware. It is a sophisticated workaround that is perfectly legal under the latest standards, yet many DIYers ignore it because they would rather just rip and replace. While panel upgrades for ev chargers are sometimes necessary, they are not always the first and only solution for a modern EV setup. But here is the real trap that catches even seasoned homeowners: the torque wrench. Most people think hand-tight is enough when connecting wires to a breaker. It isn’t. I have seen brand-new breakers char and melt because the installer didn’t follow the specific torque settings that prevent panel fires during high load charging. Copper expands when it gets hot—and at 48 amps, it gets very hot. If those lugs are not torqued to the exact inch-pound specification listed on the breaker label, the connection loosens, resistance builds, and you are looking at a fire hazard. Have you ever fallen into this trap or noticed a burnt smell near your panel? Let me know in the comments.
Why does your circuit breaker trip when the car is almost full?
This is one of the most common troubleshooting ev chargers common compliance pitfalls and fixes questions I receive. You are almost done, the car is pulling its final amps, and suddenly—click—the power is out. The culprit is usually a misunderstanding of the 80 percent rule. According to the National Electrical Code (NEC) Article 625, EV charging is considered a continuous load. This means your circuit must be rated for 125% of the charger’s output. If you are pulling 40 amps through a 40-amp breaker, it will eventually trip once it reaches its thermal limit. This is the real reason your circuit breaker trips at 90 percent charge; it is not a faulty car, it is an issue with ensuring code compliance when installing ev chargers. Understanding these thermal dynamics is the difference between a reliable morning commute and a dead battery.
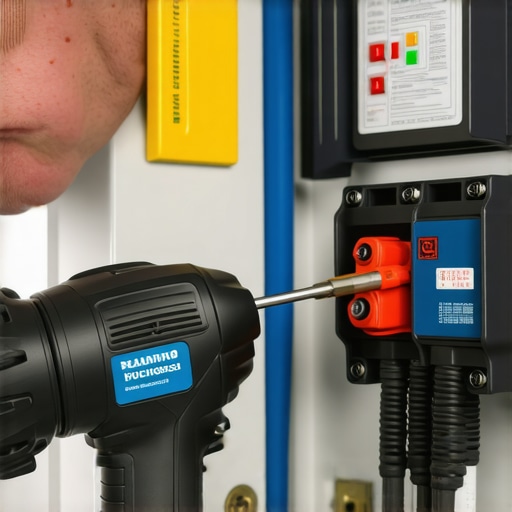
I learned the hard way that a standard screwdriver and a ‘tight enough’ grip are the fastest ways to melt a $500 piece of equipment. If you aren’t using a calibrated torque tool, you are playing a high-stakes game with electrical resistance. I personally use the Wera Kraftform Kompakt Turbo torque set because it allows me to hit the exact specifications required by manufacturers without stripping the soft brass lugs found in many chargers. For instance, the official Tesla Wall Connector Installation Manual explicitly states that terminal blocks must be torqued to exactly 22 lb-in (2.5 Nm). Failing to hit this mark is the primary cause of ev charger troubleshooting expert tips for common issues, as loose connections under high-amperage loads create micro-arcs that slowly char the wire insulation until the whole unit fails. Using the specific torque settings that prevent panel fires during high load charging isn’t just about code; it’s about making sure your house doesn’t become a statistic.
See the heat before you smell the smoke
One tool that never leaves my diagnostic bag is a handheld infrared thermal camera. You don’t need a $2,000 industrial model; even a basic FLIR attachment for your phone can reveal a failing breaker before it trips. Every six months, I plug in my car and let it run for twenty minutes, then I scan the breaker and the charger’s internal terminals. If you see a bright white ‘hot spot’ compared to the rest of the wires, you’ve found a point of resistance that needs immediate attention. This simple check is how you identify 3 signs your main breaker is running dangerously hot during overnight charging. Catching a loose lug in October is much easier than dealing with a melted panel in the dead of a freezing January night.
How do I keep this equipment alive for ten years?
Maintenance for an EV charger isn’t just about the wires; it’s about the mechanical wear and tear on the handle and pins. Over time, the silver-plated pins inside your charging handle can accumulate oxidation or fine grit, especially if you live in a dusty area. I make it a habit to check the port for debris and follow the guide on how to clean the pins on your charging handle safely using compressed air and specialized contact cleaner. If your charger is mounted outside, you have to be even more vigilant. Following 3 maintenance tasks that keep your outdoor charger running through winter—like checking the gasket seals and ensuring the holster isn’t collecting ice—will prevent moisture from wicking into the electronics and causing a ground fault.
The future of your garage power plant
Looking ahead, the next big shift is going to be bi-directional charging, where your car powers your house during an outage. This is why I always recommend people look at panel upgrade strategies to meet ev charging code requirements in 2025 now, rather than later. We are moving toward a ‘smart’ garage where the charger isn’t just an appliance, but the brain of the home’s energy management system. If you haven’t already, I strongly suggest you grab a basic infrared thermometer—they’re under $30—and do a thermal scan of your panel while your car is charging tonight. It is the single most effective way to verify your installation is as rock-solid as it looks.
The Hardest Lesson I Learned About Electrical Resistance
Looking back at that 2 AM crash, the biggest takeaway wasn’t just about weight—it was about respect for the hardware. You might think you can save a few minutes by eyeballing a stud, but ensuring code compliance when installing ev chargers is the only way to sleep soundly. I’ve learned that a ‘tight’ screw isn’t always a ‘secure’ screw, and a pretty wall doesn’t mean a safe circuit. If you are debating between a quick fix and a mounting plate, choose the plate every single time. It’s better to over-engineer your mount than to wake up to a charger on the floor and a $1,000 drywall repair bill.
Tools That Saved My Sanity and My Safety
If you’re serious about maintaining a long-term setup, I highly recommend investing in a few non-negotiables. First, a calibrated torque screwdriver is essential for ev charger troubleshooting expert tips for common issues because most failures start at the terminal block. Second, keep a copy of the code compliance essentials for ev charger installations in 2025 handy to verify your work against the latest safety standards. Finally, that basic infrared thermometer I mentioned earlier is the best $30 you will ever spend on home maintenance. These aren’t just gadgets; they are the difference between guessing and knowing your system is healthy.
Your Garage is Just Getting Started
Setting up your own charging station is more than just a convenience; it is a massive step toward energy independence. While the technical side of panel upgrade strategies to meet ev charging code requirements in 2025 can feel overwhelming at first, the peace of mind you get from a job done right is worth every ounce of effort. You are building a piece of infrastructure that will serve you and your family for years. Don’t be afraid to take it slow, measure twice, and double-check those torque settings one last time. Have you ever found a loose wire or a surprisingly hot breaker during a routine check of your charger? Let me know in the comments below!