I was standing in my garage last Tuesday, coffee in one hand and a flashlight in the other, just staring into the guts of my electrical panel. I was planning out where to fit a new 50-amp circuit for my car, thinking I had plenty of room. Then I saw it. Two black wires squeezed under a single screw on a 20-amp breaker. My heart sank. It looked like a DIY shortcut from the previous owner, and honestly, it is a miracle the house had not smelled like burning plastic yet. This kind of hack is common when someone wants to add a garage light or an extra outlet without doing the math, but when you are looking at your main service, these little shortcuts become big liabilities.
Why Hiding an Extra Wire Under One Screw Is a Recipe for Disaster
We have all been there. You need one more outlet or a dedicated line for a small appliance, and instead of doing the right thing—adding a sub-panel or rearranging the loads—someone just shoves a second wire into an existing breaker. This is what we call a double-tap. While it might seem like a clever way to save space, it is actually a major violation of the National Electrical Code (NEC). According to the Electrical Safety Foundation International (ESFI), electrical malfunctions cause more than 50,000 house fires each year, and loose connections are a primary culprit. When you have two wires under a lug designed for one, they cannot both be tightened properly. Metal expands and contracts as it heats up during use. One wire stays slightly looser than the other, starts arcing, and generates intense heat. Before you know it, you are looking at a dying breaker or a charred busbar that costs thousands to replace.
Does This Really Matter if My Lights Are Not Flickering?
I get the skepticism. If the breaker is not tripping and the TV stays on, why mess with it? I used to think the same way early in my career. I once ignored a double-tapped connection in a rental unit because I was in a rush and thought it had been fine for twenty years. Three months later, I was back there in the middle of the night because the arcing had literally welded the breaker to the panel and the tenant lost half their power. It is a silent problem until it is not. Especially if you are considering upgrading your panel for better EV charging performance, you cannot afford these hidden weak points. A Level 2 charger pulls a heavy, sustained load for hours at a time—unlike a toaster or a vacuum that runs for minutes. That kind of continuous current will find every single loose connection in your system and exploit it until something fails. If you are about to start an install, you need to know how to pass your electrical inspection on the first visit, and trust me, an inspector will spot a double-tap faster than a cat spots a laser pointer. Have you ever peeked inside your panel and seen two wires fighting for the same spot? I would love to hear your horror stories or if you have found something similar in your own home.
Fix the Double-Tap with a Simple Pigtail
To resolve a double-tap, you do not always need a massive panel upgrade. The cleanest way is to use a pigtail. You take both wires that were fighting for the same screw, join them with a third, short length of wire using a wire nut, and then secure that single pigtail into the breaker lug. This ensures a solid mechanical connection. I remember my first solo job where I tried to force two heavy wires into a single lug; it felt like wrestling an octopus and resulted in a loose connection that hissed the moment I flipped the switch. It was a terrifying lesson in why the most common DIY mistakes in home charger installations usually involve poor wire management. When doing this, keep an eye on materials. You need to know the difference between copper and aluminum wiring for high load circuits, as mixing them without the right connectors causes oxidation and fire hazards. 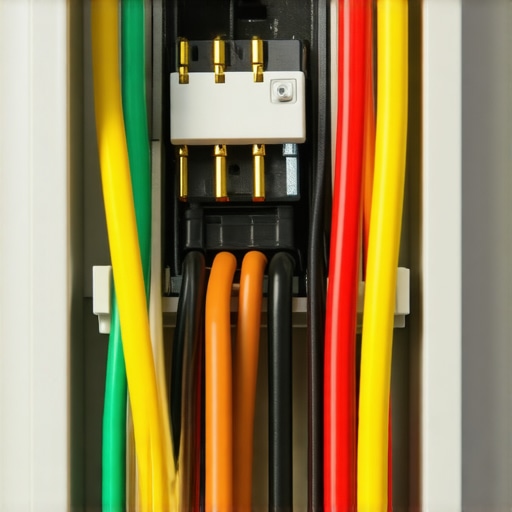
Avoid the Hazard of a Loose Neutral
While you are in there fixing the hot wires, check the neutral bar. A single loose white wire can cause voltage spikes that fry your electronics. I have seen the hidden danger of loose neutral wires in your electrical panel turn a simple car charge into a whole-house appliance graveyard. Give every screw a gentle tug to ensure it is seated tight.
The Math Behind Your 100-Amp Service Limit
Before you even buy a charger, you have to know if your home can handle it. Most older homes run on a 100-amp service, which sounds like a lot until you realize the AC, dryer, and oven are all running at once. You need to learn how to calculate if your 100 amp service can handle a daily commute. If your math comes up short, you do not necessarily need a $3,000 service upgrade. You can often use smart energy management or learn how to balance your household loads to avoid tripping the main breaker by scheduling your car to charge at 2:00 AM when the rest of the house is drawing minimal power.
Why Hardwired Connections Win Every Time
Many people opt for a NEMA 14-50 plug because it seems easier, but a hardwired setup is far superior for high-load cycles. I once installed a plug-in unit for a client who later called me because the outlet was melting—not because of the car, but because the cheap range-grade outlet could not handle the 40-amp continuous draw. Considering the benefit of a hardwired charger over a NEMA plug, you get a more weather-resistant connection and often a higher charging speed. Plus, keep in mind that the specific breaker brand that keeps tripping on Level 2 chargers often does so because of the extra heat generated at the plug-in interface.
Label Your Way to a Passed Inspection
The inspector is not just looking at your wires; they are looking at your organization. A panel that looks like a bowl of spaghetti is an automatic red flag. Use a permanent marker or a label maker to clearly identify the new circuit. If you are unsure what to write, check the specific circuit labels required by the electrical inspector in your jurisdiction. Proper labeling is the final hurdle in how to pass your electrical inspection on the first visit. If the inspector sees a clean, labeled, and balanced panel, they are much more likely to trust the work hidden behind the walls.While a clean label and a pigtail fix the immediate mess, let’s talk about the biggest misconception in the industry: the ‘mandatory’ 200-amp upgrade. I can’t tell you how many times I’ve seen contractors quote five figures for a full service swap the moment a client mentions an EV. The truth is, many homes can thrive on a 100-amp limit by utilizing smart load management. This isn’t just my opinion; the National Fire Protection Association (NFPA) provides specific guidelines in NEC Article 625 for Electric Vehicle Power Transfer Systems that emphasize the use of energy management systems to prevent overloading. If you are upgrading your panel for better EV charging performance, focus on the math of your existing service first. You might find that how to use a 100-amp panel for ev charging without a costly upgrade involves a $200 smart splitter or a load-shedding device rather than a $4,000 panel replacement.
Why Does Your Charger Trip Even When Nothing Else is On?
This is a sophisticated headache I call ‘GFCI Layering.’ Most modern Level 2 chargers have built-in Ground Fault Circuit Interrupter (GFCI) protection. If you install that charger on a circuit protected by a GFCI breaker, the two systems can ‘chatter’ or conflict, leading to nuisance trips that leave you with a dead battery in the morning. When ensuring code compliance when installing ev chargers, you have to balance the local inspector’s demand for a GFCI breaker with the manufacturer’s internal safety specs. It’s one of those ev charger troubleshooting expert tips for common issues that separates a pro from a weekend warrior.
Don’t Ignore the Torque Wrench
Here is the ‘oops’ factor that fails inspections: tightening by feel. Most DIYers—and even some pros—just crank down on the breaker lug until it feels ‘tight enough.’ However, every breaker has a specific inch-pound torque rating printed on the side. If you are too loose, you get arcing; if you are too tight, you crush the wire strands, creating a high-resistance point that generates heat. This is exactly how the common wire sizing error that causes voltage drops during charging often starts—it’s not the wire size itself, but the connection point failing under stress. Before you close that panel, how to verify code compliance for your ev charger installation starts with a calibrated torque screwdriver. It might seem like overkill, but when that car is pulling 48 amps for six hours straight, ‘finger tight’ is a fire hazard. Another trap is the ‘conduit fill’ mistake. People try to shove too many conductors into a small pipe, which traps heat and leads to troubleshooting ev chargers common compliance pitfalls and fixes later on. High-load circuits aren’t just about getting power from A to B; they are about managing the thermal energy created by that power. Have you ever fallen into this trap or found a ‘pro’ who skipped the torque wrench? Let me know in the comments.Speaking of things pros often skip, let’s talk about my favorite ‘secret weapon’ for long-term safety: the thermal camera. After I finish any install and the car has been pulling a full load for at least thirty minutes, I pull out my FLIR C5. It allows me to see heat signatures that the naked eye—and even a torque wrench—might miss. If I see a bright purple glow at a breaker lug, I know I have a high-resistance connection that needs immediate attention. Learning how to spot a dangerous heat build-up in your ev charging cable or at the panel is the difference between a system that lasts twenty years and one that melts in two. According to the InterNational Electrical Testing Association (NETA) standards for infrared thermography, a temperature difference of as little as 4°C between similar components under similar load can indicate a deficiency that requires investigation.
How do I maintain my home charging setup for the long haul?
Maintenance isn’t just about the wires inside the wall; it’s about the hardware you touch every single day. Dust, spider webs, and even microscopic oxidation can build up on the contacts of your charging handle. Every six months, I recommend a quick inspection of the plug. You should learn how to clean the pins on your charging handle safely using specialized contact cleaner and a lint-free swab. While you are at it, don’t ignore the digital side of things. Many modern chargers are basically computers on your wall. Knowing how to update your charger software without calling a technician can fix ghost errors and connectivity drops before they leave you stranded. If you are constantly seeing red rings or ‘No Signal’ errors, you might be dealing with troubleshooting ev charger connectivity problems that are often solved by a simple firmware push or a router reboot.
Prepare for the Two-Car Future Without Redoing Everything
Most people start with one EV, but it’s rarely the last. If you are already digging trenches or opening walls, think about how to upgrade your garage sub-panel for dual charging stations now rather than later. Installing a 100-amp sub-panel in the garage today means you won’t have to touch your main service when your spouse eventually trades in their gas car for an electric SUV. This forward-thinking approach is central to panel upgrade strategies to meet ev charging code requirements in 2025. We are moving toward a world where ‘bidirectional charging’ will allow your car to power your house during a blackout, and your panel needs to be ready for that two-way street of energy.
The Scaling Trap Most Homeowners Fall Into
The biggest mistake I see when scaling up is ignoring how to load balance your home electrical system without a full panel swap. You don’t always need more power; you just need to be smarter with the power you have. Smart chargers can now ‘talk’ to each other, sharing a single 60-amp circuit so that both cars get a full charge by morning without ever exceeding the house’s capacity. If you want to take your setup to the pro level, I challenge you to try this: download a circuit mapping app or use a dedicated home energy monitor for one week. Use that data to identify your peak usage hours. Once you see the numbers, you can refine your charging schedule to a science, ensuring you never push your main breaker to its limit. If you have questions about specific gear or need help deciphering your load calc, check our contact us page—I’m always happy to talk shop.
Three Hard Lessons From My Worst High-Load Circuit Fails
Over the years, I’ve realized that the ‘click’ of a calibrated torque wrench is the most satisfying sound in the electrical trade. It represents the peace of mind that comes from knowing every connection is seated perfectly. I once spent three hours tracing a phantom voltage drop only to find a loose lug that was a week away from melting—now, I never skip the final check. Another lightbulb moment was realizing that documentation is a gift to your future self. I’ve started using a label maker for every conductor, which makes ev charger troubleshooting expert tips for common issues much easier to apply when you aren’t guessing which black wire goes to which room.
My Professional Toolkit for a Safe Installation
If you are serious about DIY electrical work, there are three things I never step into a garage without. First, the NFPA 70: National Electrical Code handbook—the version with the tabs—is essential for how to verify code compliance for your ev charger installation. Second, a high-quality thermal camera like the FLIR C5 lets you see ‘invisible’ heat before it becomes a fire. Lastly, a Wi-Fi signal strength meter is underrated; it’s the best way to prevent troubleshooting ev charger connectivity problems before you even mount the hardware to the wall.
Take Charge of Your Home Energy Future
Transitioning your home to support electric transport is more than just a weekend project; it is a major step toward a more efficient, modern lifestyle. By taking the time to learn how to load balance your home electrical system without a full panel swap, you are proving that smart management beats brute-force upgrades every time. Don’t be intimidated by the copper and breakers—when you follow the code and respect the current, a successful panel upgrade is well within your reach. If you hit a wall or just want a second pair of eyes on your load calcs, reach out through our contact us page.
Have you ever opened your panel and found a ‘DIY surprise’ from a previous owner that made your jaw drop? Let me know in the comments below!