I’ll never forget the sinking feeling I had last July. I’d just brought home a shiny new Level 2 charger, ready to ditch the slow trickle of my standard wall outlet and finally enjoy fast home charging. I opened my electrical panel door, expecting an easy afternoon of wiring, only to find a crowded mess of breakers and zero breathing room. It wasn’t just that I lacked two empty slots; I didn’t even have the physical clearance to safely stand in front of the box. I felt like I’d bought a piano for a room with no floor. My biggest mistake early on was thinking I could just ‘squeeze’ things in by shifting wires around, but that kind of thinking is exactly how projects get shut down by the city. It’s a tight fit, and safety isn’t optional.
The Day My Garage Project Hit a Brick Wall
This is the hurdle most of us face but rarely talk about until we’re already holding a screwdriver. We spend all our time researching amperage and wire gauge, but we forget that the National Electrical Code (NEC) cares deeply about the physical space around your equipment. According to the National Fire Protection Association in NEC Section 110.26, you need a clear working space at least 30 inches wide and 36 inches deep in front of your electrical panel. If you can’t stand there comfortably to flip a switch in an emergency because a water heater or a tool bench is in the way, you are failing before you even begin. I’ve seen so many well-meaning DIYers run into the working space violation that fails more EV panel inspections than anything else. It’s a gut-punch to get that red tag from an inspector. Today, I am going to walk you through exactly what your panel needs—physically and electrically—so you don’t end up with a rejected permit. We will figure out how to calculate if your current setup can handle the load or if you need to clear out some serious square footage first.
Is This Working Space Rule Just a Money Grab?
I used to think these codes were just red tape designed to make me spend more on contractors. In my younger days, I actually tried to hide a small storage shelf right in front of my sub-panel, thinking I was being clever with my garage layout. It was a classic rookie move that nearly cost me my home insurance coverage. An inspector once told me that most house fires aren’t caused by the equipment failing, but by the inability of a human to reach the breaker fast enough because of clutter. It’s not about making your life hard; it’s about ensuring code compliance when installing EV chargers so your house doesn’t become a statistic. Have you ever opened your panel and felt like there just wasn’t enough room to breathe, let alone add a 50-amp circuit? You aren’t alone, and it’s much better to address these code compliance essentials now than to have a professional tell you your whole garage layout is illegal during the final walkthrough.
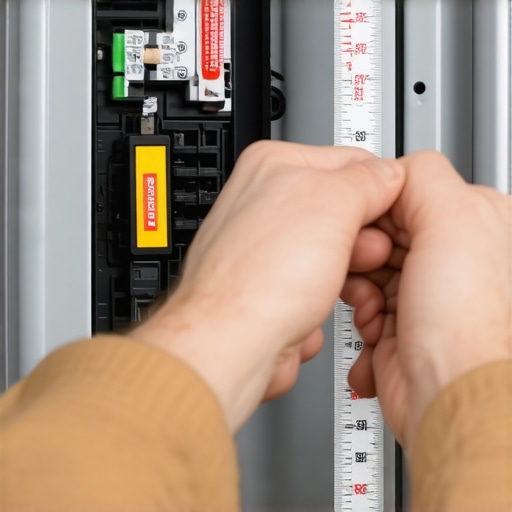
Grab Your Tape Measure and Mark Your Territory
Before you even think about buying a 50-amp breaker, you need to treat your electrical panel like a VIP. It requires a dedicated ‘no-fly zone’ that many homeowners treat as a storage suggestion rather than a legal requirement. Think of it like this: if you were a firefighter in a smoke-filled room, you’d need to reach that panel without tripping over a lawnmower or a stack of winter tires. You are looking for a clear rectangle of space that is at least 30 inches wide and 36 inches deep. Importantly, that 30-inch width doesn’t have to be centered on the panel; it just has to encompass it. If you’re struggling with a cramped layout, you should check out these 5 new garage panel clearance rules to pass your 2026 audit to see if your current setup even stands a chance.
The Heavy Metal Workbench That Cost Me Three Days
I learned this the hard way back in 2021. I had a massive, bolted-down steel workbench that sat exactly 31 inches away from my panel face. I figured five inches of missing space wouldn’t hurt anyone. I was wrong. The inspector walked in, didn’t even open the panel door, and slapped a red ‘Failed’ sticker right on the glass. I spent the next three days unbolting 400 pounds of steel and sweating through my shirt just to shift the bench four inches to the left. It was a brutal lesson in why the working space violation that fails more EV panel inspections than anything else is the first thing you should verify. If your garage is a Tetris puzzle, solve it now, or the city will solve it for you by denying your permit.
Do Not Forget the 90-Degree Swing Test
Another physical hurdle people miss is the panel door itself. The National Electrical Code requires that the door must be able to open to at least a 90-degree angle. If you’ve built a custom cabinet around your panel to ‘hide the eyesore,’ you might have accidentally created a code violation. If that door hits a cabinet frame at 85 degrees, you’re looking at 3 reasons your ev permit application just got rejected. The goal is easy access. In an emergency, you don’t want to be fumbling with a door that only opens halfway. Clear the path, remove the obstructions, and ensure your head won’t hit a low-hanging shelf when you lean in to inspect the breakers.
Verify Your Real Amperage Before Buying the Charger
Once you have the physical space, you have to do the math. Just because you have a 200-amp main breaker doesn’t mean you have 50 amps of ‘spare’ power. You have to account for your AC, your electric dryer, and that power-hungry hot tub in the backyard. You need to how to tell if your electrical panel can actually handle a level 2 charger by performing a formal load calculation. If you’re maxed out, you might need to look into upgrading your panel for better ev charging performance or using a smart load-management device that throttles the charger when the oven is on.
Use a Torque Screwdriver or Prepare to Fail
The final ‘meat’ of the prep work is something almost every DIYer skips: torque. When you finally install that new breaker, you cannot just tighten the lugs until they feel ‘snug.’ Inspectors in 2025 and 2026 are increasingly checking for specific torque settings marked on the breaker itself. I’ve seen dozens of projects fail because of the forgotten torque spec that fails half of all panel inspections. A loose wire is a fire hazard, and an over-tightened wire can snap or arc. Buy or rent a real torque screwdriver and follow the inch-pound requirements listed on the equipment. It’s the difference between a safe home and a melted busbar.
Most contractors will tell you that if you’re living with an older 100-amp service, you’re essentially dead in the water without a four-figure service upgrade. I’m going to challenge that right now. In my experience, a full service replacement is often an expensive ‘default’ answer for electricians who don’t want to deal with the nuances of load management. By using a smart energy management system, you can prioritize your EV charging based on your home’s real-time demand, allowing you to stay within your current limits. If you’re on the fence, learning how to use a 100-amp panel for EV charging without a costly upgrade can save you thousands of dollars while still staying perfectly within the bounds of the 2025 NEC guidelines.
Why Does Your Charger Drop Offline When the Voltage Seems Perfect?
This is where the ‘hidden’ compliance issues usually crawl out of the woodwork. You’ve done the load calc, you’ve torqued the lugs, but the charger keeps tripping or losing its smart features. The ‘Oops’ factor here is usually electrical noise or improper grounding. I’ve seen homeowners spend weeks troubleshooting EV charger connectivity problems only to realize the issue wasn’t their router—it was a ‘noisy’ circuit caused by a loose neutral or an induction loop in the conduit. A study by the Electric Power Research Institute (EPRI) highlights that residential EV loads are uniquely sensitive to power quality issues that standard appliances simply ignore. If your wiring isn’t pristine, the charger’s onboard computer will shut the session down to protect itself, leaving you with an empty tank in the morning.
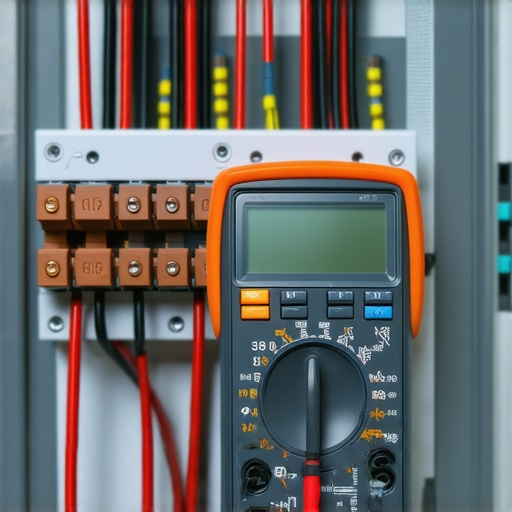
Another nuance that catches veterans off guard is the thermal behavior of the wire itself. Many DIYers assume that if a wire is rated for 50 amps, it can run 50 amps forever. But EV charging is a ‘continuous load,’ meaning it runs for hours at a time. This generates a level of sustained heat that most residential circuits never experience. I’ve walked into garages where the smell of melting plastic was unmistakable because of 3 common wire sizing errors that melt breakers during long charging sessions. If you aren’t sizing your conductors for that 125% continuous load factor, you’re not just violating code; you’re building a slow-motion fuse in your walls.
The Grounding Error That Wipes Out Motherboards
We need to talk about the ‘Grounding Trap.’ I’ve seen perfectly installed chargers die in under a year because the installer treated the ground wire like an afterthought. In an EV ecosystem, the ground isn’t just for safety; it’s a communication path. If you have a poor connection at the rod or a ‘bootleg ground’ in a sub-panel, you are inviting voltage spikes to fry the charger’s sensitive logic board. This is one of those 3 grounding errors that kill EV charger motherboards faster than a lightning strike. Before you button up that panel, you must verify code compliance for your EV charger installation with a dedicated ground resistance test. Have you ever encountered a weird electrical ‘ghost’ in your garage after installing a high-draw appliance? Let me know in the comments below—I’d love to hear your troubleshooting horror stories.
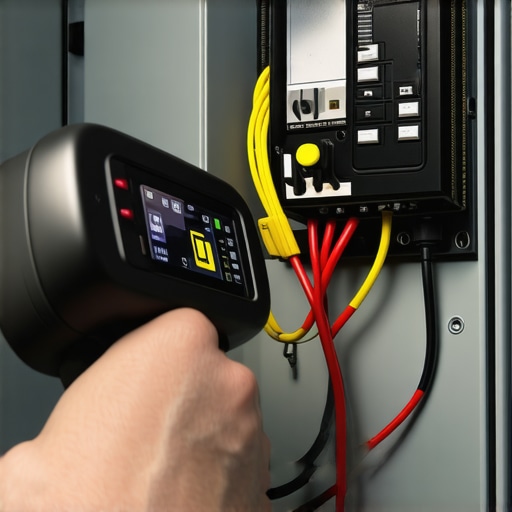
If I could go back and give myself one piece of gear when I started, it wouldn’t be a fancy wire stripper—it would be a thermal imaging camera. I’ve started using a FLIR TG165-X for every single installation because it reveals what your eyes can’t: heat. When you’re pushing 40 or 50 amps through a residential panel for six hours straight, you need to know if a lug is loose before it starts to smoke. If you’ve ever wondered why your main breaker runs hot during level 2 charging, a quick thermal scan will tell you if it’s normal operating temperature or a disaster waiting to happen. It’s the easiest way how to spot a dangerous heat build-up in your ev charging cable before the insulation becomes brittle. According to the International Association of Electrical Inspectors (IAEI) in their guide on residential electrical systems, termination points are the most frequent site of thermal failure in high-draw circuits. Checking these points with a thermal camera during a peak charging session is the gold standard for home safety.
How do I keep my EV charger running like new for years?
Maintenance for an EV charger isn’t like changing oil, but it does require a proactive eye. I set a calendar reminder every six months to do a ‘physical’ on my equipment. First, I check the handle pins for any signs of arcing or pitting. If you find your car won’t start a session, it might be why your ev charger stops mid-session without throwing a code. Second, I look for firmware updates. Many modern units from Wallbox or Tesla receive over-the-air updates that improve thermal management. Learning how to update your charger software without calling a technician can prevent minor bugs from turning into hardware-killing glitches. Also, don’t ignore the cable itself. If it’s coiled tightly while charging, you’re creating an induction coil that traps heat; always unspool it fully to keep the temperature down and understand why your charging cable gets warm and when you should actually worry.
The Future of Home Energy is More Than Just a Bigger Panel
Looking ahead to 2026 and beyond, we are moving away from the ‘brute force’ method of adding bigger and bigger breakers. The next big trend is bidirectional charging (V2H), where your car becomes the backup battery for your house. This shift means your panel is going to be working twice as hard—charging at night and discharging during peak utility hours. This constant cycling makes your initial installation quality even more critical. If you skipped the forgotten torque spec that fails half of all panel inspections today, your system likely won’t survive the transition to a bidirectional load in two years. We are entering an era of smart energy management where software, not just copper, dictates our home’s capacity. To stay ahead of the curve, I highly recommend doing one thing this weekend: take five minutes to tighten the lugs on your EV breaker (with the power off!) using a proper torque screwdriver. It is the single most effective way to ensure your home is ready for the future of the grid.
I’ll never forget the sinking feeling I had last July. I’d just brought home a shiny new Level 2 charger, ready to ditch the slow trickle of my standard wall outlet and finally enjoy fast home charging. I opened my electrical panel door, expecting an easy afternoon of wiring, only to find a crowded mess of breakers and zero breathing room. It wasn’t just that I lacked two empty slots; I didn’t even have the physical clearance to safely stand in front of the box. I felt like I’d bought a piano for a room with no floor. My biggest mistake early on was thinking I could just ‘squeeze’ things in by shifting wires around, but that kind of thinking is exactly how projects get shut down by the city. It’s a tight fit, and safety isn’t optional.
The Day My Garage Project Hit a Brick Wall
This is the hurdle most of us face but rarely talk about until we’re already holding a screwdriver. We spend all our time researching amperage and wire gauge, but we forget that the National Electrical Code (NEC) cares deeply about the physical space around your equipment. According to the National Fire Protection Association in NEC Section 110.26, you need a clear working space at least 30 inches wide and 36 inches deep in front of your electrical panel. If you can’t stand there comfortably to flip a switch in an emergency because a water heater or a tool bench is in the way, you are failing before you even begin. I’ve seen so many well-meaning DIYers run into the working space violation that fails more EV panel inspections than anything else. It’s a gut-punch to get that red tag from an inspector. Today, I am going to walk you through exactly what your panel needs—physically and electrically—so you don’t end up with a rejected permit. We will figure out how to calculate if your current setup can handle the load or if you need to clear out some serious square footage first.
Is This Working Space Rule Just a Money Grab?
I used to think these codes were just red tape designed to make me spend more on contractors. In my younger days, I actually tried to hide a small storage shelf right in front of my sub-panel, thinking I was being clever with my garage layout. It was a classic rookie move that nearly cost me my home insurance coverage. An inspector once told me that most house fires aren’t caused by the equipment failing, but by the inability of a human to reach the breaker fast enough because of clutter. It’s not about making your life hard; it’s about ensuring code compliance when installing EV chargers so your house doesn’t become a statistic. Have you ever opened your panel and felt like there just wasn’t enough room to breathe, let alone add a 50-amp circuit? You aren’t alone, and it’s much better to address these code compliance essentials now than to have a professional tell you your whole garage layout is illegal during the final walkthrough.
Grab Your Tape Measure and Mark Your Territory
Before you even think about buying a 50-amp breaker, you need to treat your electrical panel like a VIP. It requires a dedicated ‘no-fly zone’ that many homeowners treat as a storage suggestion rather than a legal requirement. Think of it like this: if you were a firefighter in a smoke-filled room, you’d need to reach that panel without tripping over a lawnmower or a stack of winter tires. You are looking for a clear rectangle of space that is at least 30 inches wide and 36 inches deep. Importantly, that 30-inch width doesn’t have to be centered on the panel; it just has to encompass it. If you’re struggling with a cramped layout, you should check out these 5 new garage panel clearance rules to pass your 2026 audit to see if your current setup even stands a chance.
The Heavy Metal Workbench That Cost Me Three Days
I learned this the hard way back in 2021. I had a massive, bolted-down steel workbench that sat exactly 31 inches away from my panel face. I figured five inches of missing space wouldn’t hurt anyone. I was wrong. The inspector walked in, didn’t even open the panel door, and slapped a red ‘Failed’ sticker right on the glass. I spent the next three days unbolting 400 pounds of steel and sweating through my shirt just to shift the bench four inches to the left. It was a brutal lesson in why the working space violation that fails more EV panel inspections than anything else is the first thing you should verify. If your garage is a Tetris puzzle, solve it now, or the city will solve it for you by denying your permit.
Do Not Forget the 90-Degree Swing Test
Another physical hurdle people miss is the panel door itself. The National Electrical Code requires that the door must be able to open to at least a 90-degree angle. If you’ve built a custom cabinet around your panel to ‘hide the eyesore,’ you might have accidentally created a code violation. If that door hits a cabinet frame at 85 degrees, you’re looking at 3 reasons your ev permit application just got rejected. The goal is easy access. In an emergency, you don’t want to be fumbling with a door that only opens halfway. Clear the path, remove the obstructions, and ensure your head won’t hit a low-hanging shelf when you lean in to inspect the breakers.
Verify Your Real Amperage Before Buying the Charger
Once you have the physical space, you have to do the math. Just because you have a 200-amp main breaker doesn’t mean you have 50 amps of ‘spare’ power. You have to account for your AC, your electric dryer, and that power-hungry hot tub in the backyard. You need to how to tell if your electrical panel can actually handle a level 2 charger by performing a formal load calculation. If you’re maxed out, you might need to look into upgrading your panel for better ev charging performance or using a smart load-management device that throttles the charger when the oven is on.
Use a Torque Screwdriver or Prepare to Fail
The final ‘meat’ of the prep work is something almost every DIYer skips: torque. When you finally install that new breaker, you cannot just tighten the lugs until they feel ‘snug.’ Inspectors in 2025 and 2026 are increasingly checking for specific torque settings marked on the breaker itself. I’ve seen dozens of projects fail because of the forgotten torque spec that fails half of all panel inspections. A loose wire is a fire hazard, and an over-tightened wire can snap or arc. Buy or rent a real torque screwdriver and follow the inch-pound requirements listed on the equipment. It’s the difference between a safe home and a melted busbar.
Most contractors will tell you that if you’re living with an older 100-amp service, you’re essentially dead in the water without a four-figure service upgrade. I’m going to challenge that right now. In my experience, a full service replacement is often an expensive ‘default’ answer for electricians who don’t want to deal with the nuances of load management. By using a smart energy management system, you can prioritize your EV charging based on your home’s real-time demand, allowing you to stay within your current limits. If you’re on the fence, learning how to use a 100-amp panel for EV charging without a costly upgrade can save you thousands of dollars while still staying perfectly within the bounds of the 2025 NEC guidelines.
Why Does Your Charger Drop Offline When the Voltage Seems Perfect?
This is where the ‘hidden’ compliance issues usually crawl out of the woodwork. You’ve done the load calc, you’ve torqued the lugs, but the charger keeps tripping or losing its smart features. The ‘Oops’ factor here is usually electrical noise or improper grounding. I’ve seen homeowners spend weeks troubleshooting EV charger connectivity problems only to realize the issue wasn’t their router—it was a ‘noisy’ circuit caused by a loose neutral or an induction loop in the conduit. A study by the Electric Power Research Institute (EPRI) highlights that residential EV loads are uniquely sensitive to power quality issues that standard appliances simply ignore. If your wiring isn’t pristine, the charger’s onboard computer will shut the session down to protect itself, leaving you with an empty tank in the morning.
#IMAGE_PLACE_HOLDER_C#
Another nuance that catches veterans off guard is the thermal behavior of the wire itself. Many DIYers assume that if a wire is rated for 50 amps, it can run 50 amps forever. But EV charging is a ‘continuous load,’ meaning it runs for hours at a time. This generates a level of sustained heat that most residential circuits never experience. I’ve walked into garages where the smell of melting plastic was unmistakable because of 3 common wire sizing errors that melt breakers during long charging sessions. If you aren’t sizing your conductors for that 125% continuous load factor, you’re not just violating code; you’re building a slow-motion fuse in your walls.
The Grounding Error That Wipes Out Motherboards
We need to talk about the ‘Grounding Trap.’ I’ve seen perfectly installed chargers die in under a year because the installer treated the ground wire like an afterthought. In an EV ecosystem, the ground isn’t just for safety; it’s a communication path. If you have a poor connection at the rod or a ‘bootleg ground’ in a sub-panel, you are inviting voltage spikes to fry the charger’s sensitive logic board. This is one of those 3 grounding errors that kill EV charger motherboards faster than a lightning strike. Before you button up that panel, you must verify code compliance for your EV charger installation with a dedicated ground resistance test. Have you ever encountered a weird electrical ‘ghost’ in your garage after installing a high-draw appliance? Let me know in the comments below—I’d love to hear your troubleshooting horror stories.
If I could go back and give myself one piece of gear when I started, it wouldn’t be a fancy wire stripper—it would be a thermal imaging camera. I’ve started using a FLIR TG165-X for every single installation because it reveals what your eyes can’t: heat. When you’re pushing 40 or 50 amps through a residential panel for six hours straight, you need to know if a lug is loose before it starts to smoke. If you’ve ever wondered why your main breaker runs hot during level 2 charging, a quick thermal scan will tell you if it’s normal operating temperature or a disaster waiting to happen. It’s the easiest way how to spot a dangerous heat build-up in your ev charging cable before the insulation becomes brittle. According to the International Association of Electrical Inspectors (IAEI) in their guide on residential electrical systems, termination points are the most frequent site of thermal failure in high-draw circuits. Checking these points with a thermal camera during a peak charging session is the gold standard for home safety.
How do I keep my EV charger running like new for years?
Maintenance for an EV charger isn’t like changing oil, but it does require a proactive eye. I set a calendar reminder every six months to do a ‘physical’ on my equipment. First, I check the handle pins for any signs of arcing or pitting. If you find your car won’t start a session, it might be why your ev charger stops mid-session without throwing a code. Second, I look for firmware updates. Many modern units from Wallbox or Tesla receive over-the-air updates that improve thermal management. Learning how to update your charger software without calling a technician can prevent minor bugs from turning into hardware-killing glitches. Also, don’t ignore the cable itself. If it’s coiled tightly while charging, you’re creating an induction coil that traps heat; always unspool it fully to keep the temperature down and understand why your charging cable gets warm and when you should actually worry.
The Future of Home Energy is More Than Just a Bigger Panel
Looking ahead to 2026 and beyond, we are moving away from the ‘brute force’ method of adding bigger and bigger breakers. The next big trend is bidirectional charging (V2H), where your car becomes the backup battery for your house. This shift means your panel is going to be working twice as hard—charging at night and discharging during peak utility hours. This constant cycling makes your initial installation quality even more critical. If you skipped the forgotten torque spec that fails half of all panel inspections today, your system likely won’t survive the transition to a bidirectional load in two years. We are entering an era of smart energy management where software, not just copper, dictates our home’s capacity. To stay ahead of the curve, I highly recommend doing one thing this weekend: take five minutes to tighten the lugs on your EV breaker (with the power off!) using a proper torque screwdriver. It is the single most effective way to ensure your home is ready for the future of the grid.
Three Truths I Learned the Hard Way About Home Power
Looking back at my first attempt, I realize I was focused on the ‘cool’ factor of the car and not the physics of the house. First, always assume the inspector knows more than you. They aren’t looking for a reason to fail you; they are looking for a reason to keep your family safe. If you have any doubts, reviewing the code compliance essentials for ev charger installations in 2025 is a non-negotiable step. Second, heat is the ultimate enemy. A circuit that works for five minutes might fail after five hours. If you notice a strange smell, you need to know what to do if your electrical panel smells like burning during ev charging immediately. Third, never cut corners on grounding. It’s not just a safety wire; it’s the lifeline for your car’s computer. One bad connection is one of the 3 grounding mistakes that will instantly fail your home ev inspection.
The Tools That Keep My Garage Safe
I don’t go near a panel without these three things. A calibrated torque screwdriver is the most important; it ensures I never have to worry about the forgotten torque spec that fails half of all panel inspections. Next is a non-contact voltage tester for safety, and finally, a thermal imaging camera to check for hot spots during the first big charge. I also keep a digital copy of the latest NEC updates on my phone to verify code compliance for your ev charger installation while I am actually standing in front of the box. These aren’t just gadgets; they are the difference between confidence and guesswork.
Your Path to a Faster Daily Commute
Installing your own charging station is a major milestone in home ownership. It’s about more than just convenience; it’s about modernizing your infrastructure for the next decade. By focusing on ensuring code compliance when installing ev chargers, you are protecting your investment and your peace of mind. Don’t let a crowded panel or a complex manual stop you from making the switch. Once you see that ‘Charging’ light turn green for the first time, all the measuring and calculating will be worth it. #IMAGE_PLACEHOLDER_E# Have you run into a weird clearance issue or a picky inspector during your project? Let me know in the comments below!