I still remember the distinct, faint smell of hot plastic wafting from my garage last autumn. It was only three weeks after I proudly mounted my brand-new Level 2 charger to the wall. Out of sheer curiosity, I pulled the cover off my main service panel. What I saw made my stomach drop. Right where the new double-pole breaker sat, the shiny silver bus bar had turned a sickly, mottled dark blue and purple. It looked like tempered steel fresh out of a blacksmith’s forge. If you have recently noticed this on your own electrical setup, you are not alone, and you need to pay close attention.
An EV charger is not like a toaster or a microwave. It is a continuous load that pulls massive current for hours on end, stretching your home electrical system to its absolute limits. If your installation was not done with meticulous care, that high-current draw will find the weakest link. Usually, that link is the physical connection between your breaker and the bus bar. Today, we are going to dive into why this discoloration happens, what it means for your home safety, and how you can address it before a small contact issue turns into a catastrophic garage fire.
Is a slightly discolored bus bar actually a big deal?
You might be tempted to think a little cosmetic change on a metal bar is harmless. But in my early days as a DIY enthusiast, I made the mistake of ignoring minor thermal changes, assuming the breaker would just trip if things got too hot. Why your EV breaker runs warmer than other circuits is a common topic, but there is a massive line between a warm breaker and a oxidizing, discolored bus bar. According to research from the National Fire Protection Association (NFPA), electrical distribution equipment is a leading cause of home fires, often stemming from high-resistance connections that generate intense localized heat without ever tripping a standard circuit breaker. When copper or aluminum bus bars discolor, it is a sign that temperatures have exceeded safe operating limits, chemically altering the metal and permanently reducing its conductivity.
The Dangerous Chemistry of a Hot Bus Bar
When your EV charger draws 40 or 50 amps continuously, any micro-gap between the breaker jaw and the bus bar acts as a tiny heater. This is usually caused by loose connections, mismatched breaker brands, or a complete lack of proper torque. I learned this the hard way during a previous project where I skipped using a torque wrench, leading to a costly panel upgrade. If the connection is even slightly loose, resistive heating begins, oxidizing the metal. This oxide layer is highly resistive, which creates even more heat in a dangerous, self-repeating cycle. If you are worried your current panel cannot handle the stress, you might want to look into signs your main breaker is overwhelmed before things get worse. Have you noticed any odd smells near your electrical panel, or does the cover feel warm to the touch after your car has been charging for an hour? Let me know in the comments below, because catching this early is the key to protecting your home.
How to Stop the Sizzling Before It Destroys Your Panel
Addressing a discolored bus bar is not a job you can postpone. If you have spotted that unmistakable blue-purple hue on your panel steel, the damage is already underway. To fix this safely, you must treat your electrical panel like a precision engine. Every connection must be secure, clean, and calibrated. Here is the exact sequence I used to salvage my own system and ensure it aligned with standard safety regulations.
Step 1: Kill the Power and Verify Dead Lines
Never work inside a live panel. I once watched an apprentice casually reach for a breaker clip without checking the main feed, only to pull back with a hand shaking from a near-miss static discharge. Turn off the main breaker. Even then, remember that the incoming lugs on the utility side remain live. Use a reliable, non-contact voltage tester to probe the breaker you are working on, the adjacent breakers, and the bus bar itself. Do not proceed until your tester is completely silent.
Step 2: Inspect the Bus Bar and Determine the Damage
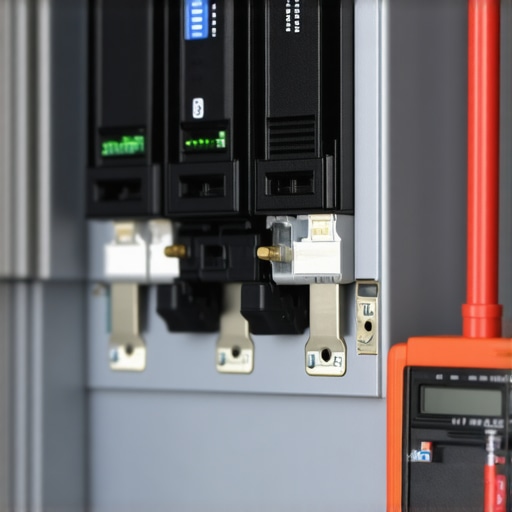
Pull the EV breaker straight off the bus bar tabs. Look closely at the metal contacts. If the bus bar is merely slightly discolored with a thin layer of surface oxidation, you can often clean it. However, if you see deep pitting, melted copper, or structural warping of the metal tab, cleaning is no longer an option. At this stage, you are looking at a mandatory physical replacement. Continuing to use a pitted bar will only cause immediate localized overheating, even with a brand-new breaker. If the damage is severe, you must learn panel upgrades for EV chargers to safely restore power to your home.
Step 3: Clean and Restore the Metal Contacts
If the bus bar is structurally sound but oxidized, you need to strip away that resistive chemical layer. Grab a fine-grit, non-conductive abrasive pad like a gray Scotch-Brite pad. Gently buff the surface of the bus bar tab until you see shiny, bright metal. Never use steel wool, as tiny metal fibers can fall into the panel and cause a catastrophic short-circuit later. Once buffed clean, wipe the surface with a tiny amount of electrical-grade contact cleaner on a lint-free microfiber cloth to remove remaining debris.
Step 4: Use the Right Breaker and Apply Correct Torque
One of the most common mistakes is snapping a mismatched breaker brand onto a bus bar. Just because a breaker physically fits into the slot does not mean it makes proper contact. Mismatched brands create microscopic gaps that invite high-resistance heating. Always use a brand-new, manufacturer-approved breaker designed specifically for your panel. When securing the conductors, skip the hand-tighten guessing game. Refer to the panel door label for torque specifications. I bought a dedicated digital torque screwdriver for this exact task, torquing my terminals to 45 inch-pounds. This simple tool completely stopped the overheating issues on my unit. You can prevent major safety hazards by learning the specific torque settings that prevent garage fires.
Step 5: Load Test Your Fix and Monitor Temperatures
After reinstalling the panel cover and restoring power, turn on your EV charger. Let your car pull its maximum current for at least 45 minutes. To safely verify your work without opening a live panel, use an infrared thermal camera pointed at the dead-front cover directly over the EV breaker. You should see a stable, warm signature rather than a concentrated, white-hot hotspot. If you want to double-check your setup for other compliance issues, read up on EV charger troubleshooting expert tips for common issues to keep your garage safe and efficient.
Most DIY forums and residential electricians will tell you that if your panel has a physical slot open, you are good to install a Level 2 charging station. But in my years of diagnosing electrical failures, I have learned that this is a dangerous oversimplification. The reality of continuous load management is far more nuanced, and treating an EV charger like a standard heavy appliance is a recipe for silent, high-heat damage.
Why does my panel pass a physical inspection but still overheat?
Many homeowners assume that because their main breaker is not tripping, their system is operating safely. In reality, standard thermal-magnetic breakers only trip when they detect a massive, sudden overcurrent or a sustained thermal overload at the breaker itself. They are completely blind to a high-resistance contact point on your bus bar. According to data from the International Association of Electrical Inspectors (IAEI), a significant percentage of residential electrical failures occur at connection points that are physically tight but chemically compromised by micro-arcing. When you draw 48 amps continuously for eight hours, any microscopic air gap acts as an induction heater, raising temperatures to hundreds of degrees without ever reaching the threshold required to trip the breaker. This is why understanding ensuring code compliance when installing EV chargers goes far deeper than simply matching the numbers on paper.
The Dual-Breaker Trap Most Homeowners Fall Into
Here is a massive trap I see all the time: homeowners installing a high-amperage EV breaker directly opposite another high-load breaker (like a central air conditioner or electric range) on the same bus bar finger. Even if your overall load calculation says you have plenty of room on your 200-amp service, concentrating two massive continuous loads on the exact same physical section of the bus bar creates a localized thermal bottleneck. Over time, this concentrated thermal stress warps the metal tabs, leading to the exact discoloration and pitting we discussed earlier. To avoid this, you need to strategicially space out your heavy-load breakers across the physical layout of your panel. For older homes, skipping a critical service evaluation is a major mistake, which is why studying panel upgrades for EV chargers is essential before adding any high-draw circuit. Have you ever noticed your panel humming or gotten caught in this common layout trap? Let me know in the comments below.
Modern Load Calculations Go Far Beyond Basic Amp Ratings
Another common mistake is relying purely on historic energy bills to estimate your home’s capacity. The National Electrical Code (NEC) demands a formal Article 220 load calculation. If you simply guess, you risk overloading your service entrance during peak times, such as when your heat pump and water heater kick on simultaneously while your car is charging. Modern regulations are shifting quickly, and keeping up with panel upgrade strategies to meet EV charging code requirements in 2025 is the best way to future-proof your setup. If your panel is indeed at its limit, you do not always need a costly service upgrade from your utility; instead, look into how smart hardware can help by reading about how load management modules prevent expensive panel upgrades. Ultimately, verifying your setup through professional diagnostics and learning how to verify code compliance for your EV charger installation will save you from expensive repairs, potential inspection failures, and most importantly, keep your home and family safe.
When it comes to high-amperage home charging, the hard work doesn’t actually end once your local inspector signs off on the permit. I treat my garage’s electrical setup like any other high-performance machine. You wouldn’t run a sports car for years without checking the oil, and you shouldn’t run a continuous 40-amp charging station without routine physical maintenance. Over time, thermal cycling—the heating and cooling of the metal parts inside your panel as you charge your vehicle and let it cool down—can naturally loosen screws and copper terminations.
How do I maintain my EV charger setup over time?
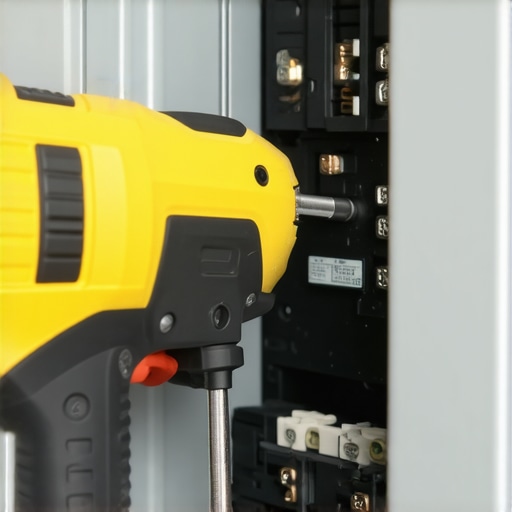
To prevent future hot spots, I highly recommend investing in a professional-grade, insulated torque screwdriver like the Wiha 28724 torque Vario-S. Personally, I use this tool every six months to double-check the torque settings on my EV breaker terminals. Before I open the panel, I make sure the main power is completely off. Then, I inspect the connections for any early signs of discoloration. You can prevent major safety hazards by learning the specific torque settings that prevent garage fires. Keeping a small digital log of these checks will help you catch minor connection issues before they lead to serious thermal damage.
Beyond checking the torque, you should regularly monitor your charging cable and handle for physical wear. Dirt, moisture, and road salt can accumulate inside the charging coupler, leading to micro-arcing and potential safety shutoffs. I use a dedicated electrical contact cleaner aerosol to spray out the handle pins annually, wiping down the exterior with a dry microfiber cloth to keep the connection pristine. If you run into any unexpected connectivity or diagnostic issues during these checks, you can easily find the root cause by exploring EV charger troubleshooting expert tips for common issues.
Looking ahead, the future of residential charging is moving rapidly toward smart, integrated systems. Within the next few years, I expect we will see widespread adoption of real-time thermal monitoring built directly into standard breaker panels. This means your system will automatically alert your phone if a breaker terminal begins to run warm, long before any visible oxidation or physical damage occurs. Until those smart panels are standard in every home, we must rely on manual inspections, quality tools, and solid maintenance practices. If you suspect your current hardware is already showing signs of aging or is struggling to handle the continuous load, taking the time to learn how to verify code compliance for your EV charger installation is the absolute best way to keep your home safe. I highly encourage you to grab your manual or lookup your panel’s torque specifications today, check those terminal connections, and make sure everything is securely tightened to spec.
The Hardest Lessons I Learned Troubleshooting My Own Panel
When I first installed my Level 2 setup, I made the classic rookie mistake of thinking a physical fit was a safe fit. Over the years of maintaining high-draw residential circuits, I have gathered a few non-negotiable insights that every EV owner should live by.
- The Visual Check is Your Best Friend: Thermal damage starts microscopically. If you only look at your panel when something goes wrong, you are already too late. Make physical panel inspections a routine part of your seasonal home maintenance.
- Mismatched Breakers Always Fail: I cannot stress this enough—never use a brand-breaker just because it snaps onto the rail. A minor physical variance of a millimeter in jaw tension is the difference between a cool running panel and a melted, oxidized bus bar.
- Permits Protect Your Liability: If your garage catches fire due to an unpermitted electrical installation, your insurance company has a massive legal loophole to deny your claim. It is always worth knowing why you need a permit for a simple charger swap before you begin.
My Essential Toolkit for High-Current Electrical Maintenance
You do not need to spend thousands of dollars on specialized industrial equipment to keep your home safe, but a few precise, high-quality tools are absolutely mandatory for maintaining heavy continuous loads.
- Wiha 28724 Insulated Torque Screwdriver: This is my go-to tool for preventing terminal backing-out due to thermal cycling. It ensures perfect calibration to exact manufacturer specs, which is crucial for preventing fires.
- Flir TG165-X Thermal Camera: Instead of guessing if a breaker is hot under the dead-front cover, this compact thermal imaging camera lets you visually map heat signatures from a safe distance while your vehicle is pulling max current.
- Gray Scotch-Brite Pads & DeoxIT Cleaner: This combination is perfect for gently removing surface oxidation without leaving conductive metallic fibers behind that could cause a destructive short-circuit inside your main service panel.
Take Control of Your Garage Safety Today
Your electric vehicle is incredibly advanced, and the system powering it needs to be just as resilient. Don’t wait until you smell hot plastic or experience a sudden blackout to take action. Upgrading your knowledge on ensuring code compliance when installing EV chargers and running routine visual checks will protect your investment and keep your household safe. If you suspect your panel is already showing warning signs, have you ever run a physical torque test on your EV breaker? Let me know about your experiences in the comments below!