It was late one evening when I first realized I was about to face a permit nightmare. My recent EV charger installation looked perfect—until the inspector pointed out the conduit depth issue that would doom my project. That lightbulb moment taught me a harsh lesson: seemingly minor details like conduit depth can make or break your permit approval. If you’re upgrading your panel or installing an EV charger, you might think you’ve covered all your bases—yet overlooked critical code requirements lurking beneath the surface.
The truth is, these 4 conduit depth errors are more common than you might believe, and they have the power to derail your entire project if you’re not careful. Today, I want to share with you exactly what to watch out for, based on my own experience and the many inspections I’ve been through. Because trust me, early mistakes can lead to failed permits, costly rework, and frustrating delays.
When I started my EV charger upgrade, I assumed that following the typical wiring practices would suffice. I didn’t realize that improper conduit depth isn’t just a minor infraction—it’s a leading cause for permit rejection. According to the National Electrical Code (NEC), conduit depths must be precise to prevent damage and ensure safety, especially when it comes to outdoor or accessible installations. You can find more detailed guidance on this at [Bright Spark Electric](https://brightsparkzelectric.com/how-to-verify-code-compliance-for-your-ev-charger-installation). Missing these details can result in costly inspections retakes, or worse, unpermitted and unsafe setups.
Let’s face it. If you’re like me, you’ve probably asked yourself, “Are these conduit requirements truly vital, or are they just bureaucratic hoops?” That skepticism is natural. But from my experience, the answer is clear: overlooking conduit depth can compromise your electrical system integrity and jeopardize your permit approval. Understanding these common pitfalls is the first step toward a foolproof installation.
In the sections ahead, I’ll walk you through the top 4 conduit depth mistakes that can fail your EV permit—and more importantly, how to avoid them. So, before you proceed with your project, ask yourself: have I double-checked my conduit depths against code standards? If you’re unsure, don’t worry. Staying ahead of these issues will save you headaches down the line—and ensure your EV charger is both safe and compliant.
Double-Check the Code Before Digging In
Start your installation journey by consulting the NEC conduit depth standards. I once skipped this step and faced a retake after the inspector flagged my conduit depth—costing me days of delay. To prevent this, print out the latest code sections and keep them accessible during your work. This acts as your blueprint, ensuring you won’t overlook critical depth requirements.
Use a Proper Measuring Tool and Set Accurate Depths
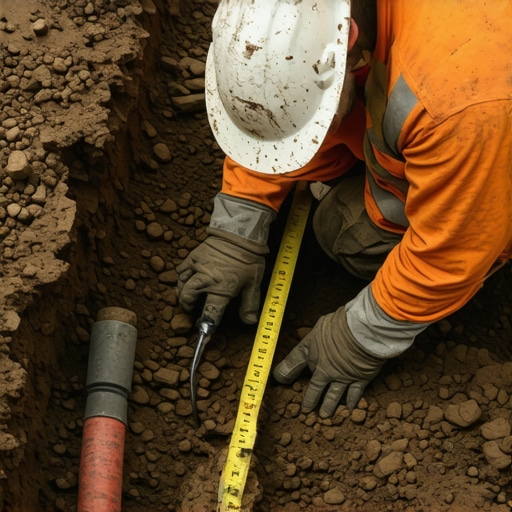
Employ a calibrated digital or mechanical measuring tape specific for conduit installations. In my last project, I used a digital caliper for precision, ensuring the conduit was exactly at the required 18 inches below grade outside and 12 inches inside. Imagine this like setting the depth for planting a seed—you want just enough to protect it but not so deep that it struggles to grow. This precise measurement prevents unintentional violations and future inspection failures.
Install a Mock-up or Test Run
Before embedding conduit fully, lay out a mock-up to verify placement and depth. I placed my conduit on a temporary support, checked the depth at multiple points, and adjusted as needed. Think of this like test-driving a car—you identify issues early and make corrections without costly rework. Document these measurements with photos or notes; these can be helpful if your inspector asks to see your work.
Maintain Consistent Depth During Installation
As you trench or route conduit, periodically check depth with your measuring tool. Use a guide—like a piece of rebar or a string with marked measurements—to maintain the correct depth throughout. When I installed my outdoor conduit, I kept a small level nearby to double-check vertical consistency. Variations are common and can cause inspection issues, just like uneven steps can be a tripping hazard. Staying vigilant keeps your installation code-compliant and safe.
Secure and Protect the Conduit Properly
Once the conduit reaches the correct depth, secure it with appropriate supports—clamps, straps, or beddings—per code standards. I learned this the hard way when a loose conduit shifted during backfilling, risking future damage. This step acts like anchoring a flagpole—sturdy support ensures longevity and compliance. Remember, external factors like soil movement or snow accumulation can shift conduit if not properly supported.
Document and Prepare for Inspection
At each critical step, take clear photos and notes. Preparing documentation of accurate measurements and installation practices streamlines the inspection process. When my inspector visited, showing detailed measurements of my conduit depths reassured them that I followed all code requirements, leading to a smooth approval. Think of this as assembling evidence that you’re compliant, saving you time and potential re-inspection fees.
 Many installers operate under the misconception that following the basic wiring guidelines guarantees compliance. However, the reality is more nuanced. A common myth is that merely adhering to local electrical codes—like the NEC—ensures your setup is foolproof. In truth, codes are often interpreted at a surface level, and overlooking subtle requirements can lead to permit rejections or safety hazards. For example, understanding the latest amendments in the 2026 NEC regarding conduit attachment methods or grounding practices is critical, as these nuances can be the difference between passing inspection or costly rework.
Are Permits Truly About Meeting the Code or Going Beyond?
Expert electricians emphasize that code compliance isn’t just about ticking boxes; it’s about anticipating inspector scrutiny and future-proofing your installation. Small nuances, such as the exact torque specifications for conduit connectors or the use of approved surge protection devices, might seem trivial but are vital for long-term safety and permit approval. According to the National Electrical Code experts, paying close attention to these details reduces the risk of inspection failures and enhances system reliability. To master these subtleties, consult authoritative resources like this detailed guide, which dives into advanced compliance considerations for EV chargers.
Beware of the oops factor—many professionals make the mistake of assuming that the latest code versions are optional or only apply to new builds. In reality, these updates are designed to address the common pitfalls encountered during inspections. A lack of awareness about these subtle requirements can trap even seasoned electricians, leading to delays and additional expenses. For instance, recent amendments mandate specific labeling for outdoor installations to avoid confusion during inspection. Ignoring these can result in immediate rejection, even if the wiring itself is sound.
Staying ahead in this game requires a proactive approach. Regularly reviewing the latest code updates and incorporating expert audits can unveil those hidden nuances that are easy to overlook. Remember, compliance isn’t static; it evolves, and so should your knowledge. Have you ever fallen into this trap? Let me know in the comments.
Invest in Reliable Diagnostic Tools for Long-Term Peace of Mind
One of the most valuable investments I made was a professional-grade multimeter capable of measuring AC and DC voltages and currents with high precision. This tool allows me to verify voltage levels at various points in my system quickly and accurately, ensuring compliance and safety. Additionally, a clamp meter provides quick insight into current flow without disconnecting wiring, which is essential for monitoring charging loads and identifying anomalies over time. I personally prefer models like the Fluke 375, because of their durability and accuracy, which are critical for ongoing troubleshooting and preventive maintenance.
Leverage Advanced Software for System Monitoring
Modern EV charger systems often come with remote monitoring features. I recommend integrating software solutions like EVBox’s onboarding platform or ChargePoint’s fleet management tools, which provide real-time data on charging sessions, system health, and fault detection. These platforms enable proactive maintenance by alerting you to potential issues before they escalate, reducing downtime and repair costs. For DIY enthusiasts, apps like EVNotify can be installed to monitor charger status and battery health remotely, keeping a close eye on your system’s long-term performance.
Develop a Routine Maintenance Schedule
Establishing a regular maintenance routine has helped me prevent many issues. This includes inspecting all wiring connections for corrosion or loose terminals, cleaning contact points, and verifying the tightness of conduit fittings. For outdoor installations, I check weatherproof enclosures and ensure seals remain intact against moisture ingress. Applying dielectric grease on threaded connections can prevent corrosion and maintain optimal conductivity over years. Consistent checkups are crucial, especially as outdoor conditions change with seasons.
How do I maintain the integrity of my EV system long-term?
Use a combination of high-quality tools and routine inspections. Regular verification of connections with a trusted multimeter, along with monitoring via remote software, enables early detection of potential failures. Additionally, keeping detailed records of maintenance activities and system performance helps identify patterns that could indicate looming problems. This proactive approach minimizes unexpected failures and prolongs the lifespan of your equipment. For any troubleshooting nuances, consult resources like this expert troubleshooting guide.
Remember, staying on top of maintenance not only ensures safety and compliance but also keeps your EV charging experience seamless and efficient. Try implementing a weekly system check using a digital clamp meter—it’s a simple step that can save you hours of troubleshooting later and keep your system running flawlessly for years to come.
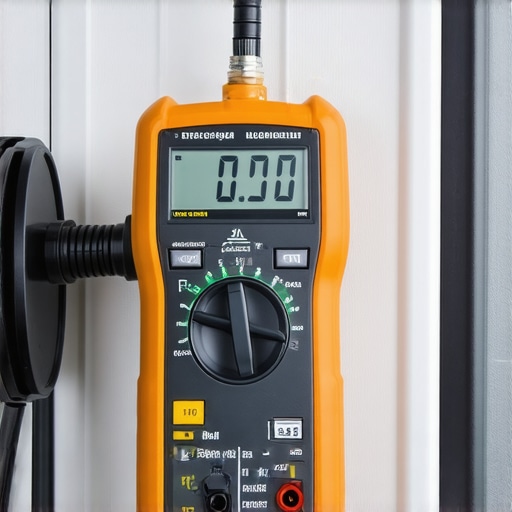
Image prompt: close-up of a digital multimeter measuring electrical current in an outdoor EV charger connection, emphasizing precision and safety. Alt text: Professional multimeter testing EV charger wiring outdoors. Title: Ensuring Reliable EV Charging with Proper Tools.
What I Didn’t Expect About Code Compliance and My EV Setup
During my installation, I discovered that even small oversights—like conduit depth—could derail my entire permit process. The harshest lesson was realizing that a simple mismeasurement might force re-inspections and delays, costing time and money. I learned that understanding the nuances of the NEC and staying up-to-date with the latest amendments is essential—it’s more than just ticking boxes, it’s about proactively safeguarding your investment.
Tools and Resources That Changed My Approach
Investing in a quality digital multimeter and clamp meter significantly improved my troubleshooting confidence. The expert tips provided by Bright Spark Electric opened my eyes to common pitfalls and precise measurement techniques. Additionally, consulting their detailed guides on code compliance and load management helped me anticipate potential issues, making my process smoother and ensuring long-term safety.
Stepping Into the Future of Safe EV Charging
If you’re considering an EV charger or panel upgrade, remember that mastery comes from continuous learning and attention to detail. Embrace the challenges as opportunities to hone your skills—by double-checking measurements, staying informed on code updates, and leveraging reliable tools, you’re not just installing equipment; you’re building a safer, more reliable system for years to come. Don’t wait for a setback to motivate your learning—start now and lead your project with confidence.
What’s one unexpected challenge you’ve faced during your EV or panel upgrade? Share your story below—I’d love to hear how you navigated it!