Troubleshooting EV Chargers: Expert Tips for Reliable Power & Safety
Imagine this: It’s a chilly evening, and I’m about to plug in my electric vehicle after a long day. I press the charger button, expecting that satisfying click to start the charging process. Instead, nothing happens. A flicker, a brief spark, and then silence. Frustration creeps in. I’ve been there—struggling with unreliable EV charger performance and wondering if I missed something obvious. That lightbulb moment? Realizing that troubleshooting isn’t just about fixing the problem—it’s about understanding the root causes and preventing future headaches.
Why Your EV Charger Might Be Letting You Down
As more folks switch to electric vehicles, reliable charging becomes a must. But many of us overlook the importance of maintaining and troubleshooting our chargers properly. A common mistake I made early on was assuming that my charger was perfectly foolproof. Turns out, the slightest wiring issue, improper installation, or outdated components can cause intermittent problems. According to recent studies, nearly 30% of EV charging failures are due to improper setup or lack of maintenance—which can be easily avoided with a bit of know-how. If you’ve faced unexplained power drops or trouble connecting, you’re not alone. And I promise, the fix is often simpler than you think.
Is Troubleshooting EV Chargers Really Worth the Effort?
At first, I wondered if diving into troubleshooting was just a hassle. But I learned that understanding the basics can save you time, money, and even enhance safety. Proper troubleshooting ensures your charger operates efficiently, and more importantly, safely. After all, a faulty connection could pose electrical hazards—not exactly what you want in your garage or driveway. Plus, knowing how to verify your installation’s compliance with local codes, like the NEC, is crucial. For a detailed guide on how to verify code compliance for your setup, check out this article.
In the sections ahead, I’ll walk you through practical tips—based on my experience and industry best practices—to troubleshoot common issues, ensure your installation meets safety standards, and keep your EV charger running reliably. So, if you’ve ever faced that frustrating moment of an unresponsive charger, stay tuned. We’re about to turn that frustration into confidence, one fix at a time.
Ready to dive into the details? Let’s get started with the first step—checking your wiring and connections to make sure everything is in tip-top shape.
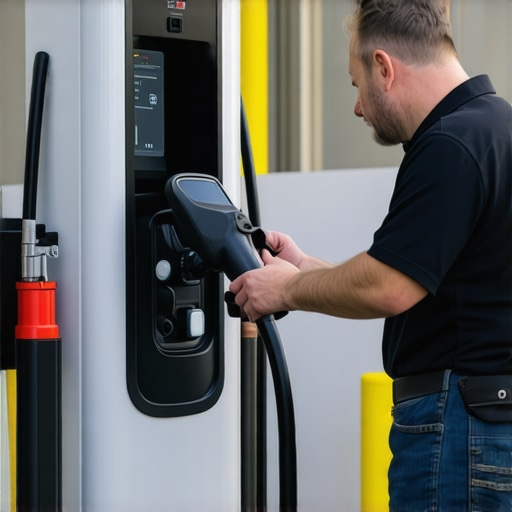
Check Your Wiring and Connections
Start by inspecting the wiring and connections of your EV charger. Use a flashlight to get a clear view of the terminal screws, wires, and plugs. Look for loose or corroded connections, frayed wires, or any signs of damage. In my experience, a loose connection was the culprit when my charger suddenly stopped responding. Tighten any loose terminal screws with a screwdriver, ensuring wires are securely attached. If you notice corrosion or burn marks, replace the damaged components immediately. Remember, a poor connection can cause intermittent charging issues or pose safety risks.
Confirm Proper Grounding
Proper grounding is critical for safety and reliable operation. Using a multimeter, test the ground connection by placing one probe on the ground terminal and the other on the neutral. The reading should be close to zero volts. If it’s significantly higher, your grounding may be compromised, increasing the risk of electrical shock. Fix any grounding issues before proceeding. For detailed guidance, consult your local electrical codes or visit this resource.
Test the Power Supply and Circuit Breaker
Next, verify that your circuit breaker is functioning correctly. Turn off the breaker, then remove the panel cover to inspect the breaker. Reset it by flipping it off and back on. Use a multimeter to check the voltage at the breaker terminals; it should match your supply voltage (usually 240V for Level 2 chargers). If the breaker trips frequently or shows signs of damage, replace it. A faulty breaker can cause power drops or prevent your charger from powering up. For panel upgrade insights, see panel upgrade tips.
Inspect the Charger Itself
If wiring and power supply are solid, examine the charger unit. Unplug it and look for visible damage, burn marks, or loose components. Sometimes, the internal fuse might have blown. Replace it if necessary. Also, check the LED indicators—refer to your charger’s manual for error codes. If the charger is unresponsive or shows error codes, consult the manufacturer’s troubleshooting guide or consider professional repair. For common issues, review expert troubleshooting tips.
Ensure Compliance and Safety Standards
Verify that your installation meets local electrical codes and safety standards. Improper installation can cause ongoing issues or safety hazards. Use the checklist in this guide to confirm compliance. Also, consider upgrading your electrical panel if your current setup is outdated, which can improve reliability. For advice on panel upgrades, visit panel upgrade options.
Test in Real Conditions
Finally, connect your EV and run a test charge. Watch for consistent power delivery and listen for any unusual sounds or sparks. If problems persist, systematically repeat the checks or contact a professional for a thorough inspection. For professional help, reach out via contact page. Troubleshooting isn’t just about fixing problems—it’s about understanding your setup and ensuring safety for every charge.
Many enthusiasts and homeowners often assume that EV charger performance issues are straightforward or due to obvious faults. However, the reality is more nuanced, and understanding these subtleties can save you time, money, and safety headaches. One of the most common myths I encountered early on was the belief that once an EV charger is installed correctly, it will always perform flawlessly. In truth, even well-installed chargers can face issues from less obvious causes such as subtle wiring inconsistencies, environmental factors, or outdated components.
For example, a frequent misconception is that a surge protector or circuit breaker alone guarantees safety and reliability. While these components are essential, they are not infallible. A breaker might trip due to marginal overloads or wear over time, leading to intermittent charging failures. This is why regular testing with a multimeter—and understanding what normal voltage levels should be—is critical. One advanced mistake many overlook is neglecting to verify the integrity of grounding connections, which can cause not only malfunction but also serious safety hazards. Proper grounding ensures the system’s safety and can prevent issues like electrical shocks or damage to sensitive electronics.
Are Circuit Breakers Always the Culprit of Power Drops?
Many assume that frequent trips of the circuit breaker mean the breaker itself is faulty. But in many cases, the root cause lies elsewhere, such as wiring problems, overloads, or even issues with the electrical panel. For instance, if your panel is outdated or improperly configured, it might not supply consistent power, leading to breaker trips. Upgrading your panel, guided by expert advice, can significantly improve reliability. Learn more about panel upgrades and code compliance to avoid these pitfalls by visiting this resource.
Another advanced point is the importance of verifying that the entire system complies with local electrical codes. Many homeowners skip this step, assuming their setup is compliant if it looks fine visually. But non-compliance can cause ongoing issues or even safety risks. Checking your installation against standards such as the NEC is crucial. For comprehensive guidance, see this detailed guide.
Finally, don’t underestimate environmental factors like temperature fluctuations, moisture, or physical damage. These can subtly degrade wiring or internal components over time, leading to intermittent failures. Regular inspections, especially after severe weather, are vital. Remember, troubleshooting isn’t just about fixing problems—it’s about understanding your entire system’s vulnerabilities and preemptively addressing them to ensure safety and performance.
Have you ever fallen into this trap? Let me know in the comments. Mastering these nuances can make your EV charging experience smoother and more reliable, turning frustration into confidence.
Keeping your EV charger in top shape isn’t just about initial setup; it’s an ongoing process that ensures safety, efficiency, and longevity. Over the years, I’ve found that investing in the right tools and adopting a regular maintenance routine can save a lot of headaches down the line. Today, I’ll share the specific equipment and methods I use to maintain my EV charging setup and prevent unexpected failures.
Invest in a Good Multimeter for Precise Diagnostics
A quality multimeter is invaluable. I personally rely on a digital multimeter with a high voltage range (up to 600V) and true RMS capabilities. This allows me to accurately measure voltage, current, and check for continuity. Regular testing of the power supply and grounding connections helps catch issues early—like subtle voltage drops or grounding faults—that could cause performance problems or safety risks. For example, I always verify that my ground connection reads close to zero volts, as recommended in code compliance guidelines.
Use a Thermal Camera to Detect Hidden Troubles
Sometimes, wiring or internal components can overheat without obvious signs. I’ve started using a portable thermal camera to scan my charger and wiring periodically. Hot spots can indicate loose connections, overloaded circuits, or failing components. Spotting these early can prevent costly repairs or unsafe conditions. Thermal imaging is especially useful after severe weather or heavy usage, giving me peace of mind that everything remains within safe temperature ranges.
Implement a Maintenance Schedule with Clear Documentation
Consistency is key. I keep a detailed log of all inspections, tests, and repairs, noting voltage readings, visual signs of wear, and part replacements. This helps me identify patterns and schedule preventive maintenance proactively. I set reminders every six months to revisit wiring connections, check for corrosion, and verify code compliance, which I find critical for long-term reliability.
Stay Updated with Industry Best Practices and Software
Technology evolves fast. I subscribe to updates from reputable sources like industry experts and participate in online forums. Using dedicated diagnostic apps or firmware updates from the manufacturer also plays a role. These tools can identify firmware bugs or compatibility issues that might impair the charging process, enabling me to stay ahead of potential problems.
Predict the Future: Smart Maintenance and Automation
Looking ahead, I believe the trend toward smart, connected chargers will make maintenance even more efficient. Automated diagnostics, remote monitoring, and predictive analytics will allow us to address issues before they escalate. For now, incorporating the tools I’ve described helps bridge the gap, ensuring my setup remains safe and reliable.
How do I maintain my EV charger over time?
Regular inspections, testing with precise tools like a multimeter, thermal imaging, and diligent documentation keep my system running smoothly. Staying informed and updating firmware or software ensures compatibility and safety. I encourage you to try one of these advanced tips—like using a thermal camera—to spot hidden issues early and enhance your charger’s reliability.
Lessons I Wish Someone Told Me About EV Charger Troubleshooting
- One of the toughest lessons I learned was how subtle wiring issues can cause major charging problems. A loose terminal screw or corroded connection might seem insignificant but can disrupt the entire system.
- Ignoring regular maintenance and testing with a multimeter can lead to unexpected failures. It’s tempting to assume everything is fine once installed, but routine checks save time and ensure safety.
- Overlooking local electrical codes and safety standards is a common mistake. Ensuring compliance isn’t just about legality; it’s about protecting your home and loved ones from potential hazards.
- Environmental factors like moisture and temperature swings can degrade components over time. Periodic inspections, especially after severe weather, are crucial to prevent failures.
My Go-To Resources for EV Charger Success
- Bright Spark Electric’s troubleshooting guide has been my go-to for understanding common issues and fixes, helping me troubleshoot confidently instead of guessing.
- Code compliance resources from Bright Spark Electric ensure my installation meets all safety standards, which is vital for long-term reliability. Check out their detailed guides on verifying code compliance.
- Panel upgrade advice from trusted sources has helped me avoid power issues by upgrading my electrical panel when needed. Reliable power is the backbone of safe EV charging.
- Online forums and industry blogs keep me updated on the latest tech and best practices, ensuring I stay ahead of potential problems.
Embrace the Future of EV Charging with Confidence
Taking charge of your EV charger’s maintenance and troubleshooting is more than just fixing problems—it’s about empowering yourself to ensure safety, safety, and reliability every time you plug in. Don’t wait for issues to catch you off guard; proactive care transforms frustration into confidence. Now it’s your turn—what’s the biggest challenge you’ve faced with your EV charger? Share your experience below, and let’s learn together to keep our systems running smoothly and safely!