3 Rigid Conduit Rules to Pass Your 2026 EV Panel Audit
Picture this: I was halfway through a panel upgrade, excited to finally get my EV charger working smoothly, when suddenly, an inspector pointed out a violation related to rigid conduit installation. My heart sank. I’d thought I was on top of everything, but that moment made me realize just how easy it is to overlook subtle yet critical code requirements—especially with the upcoming 2026 standards looming.
This experience was a lightbulb moment for me. I understood firsthand how critical it is to master the 3 Rigid Conduit Rules—those subtle, sometimes confusing guidelines that can make or break your ability to pass the essential 2026 EV panel audit. Failing to comply can delay your project or even require costly rewiring. But don’t worry—arming yourself with the right knowledge will set you up for success.
Why the 3 Rigid Conduit Rules Matter More Than Ever
The landscape of home EV charging is transforming rapidly, and the 2026 standards are no exception. These rules ensure safety, compliance, and future-proofing of your electrical system. According to the National Fire Protection Association (NFPA), improper conduit installation can significantly increase fire risk, making adherence to these rules vital for safety and insurance purposes.1 Whether you’re installing a new charger or upgrading your panel, understanding these regulations isn’t just bureaucratic red tape; it’s about protecting your home and family.
Early in my journey, I made a costly mistake. I assumed that if the conduit was the right diameter, I was good to go. Nope. The devil’s in the details. Failing to follow specific bend, support, and grounding rules can lead to non-compliance. These aren’t just arbitrary guidelines—they’re engineered standards designed to prevent failures and hazards.
So, if you’re feeling overwhelmed or worried about passing your upcoming inspection, rest assured—this article will walk you through the essential conduit rules you need to master. Ready to dive into these must-know tips and avoid costly pitfalls? Let’s get started.
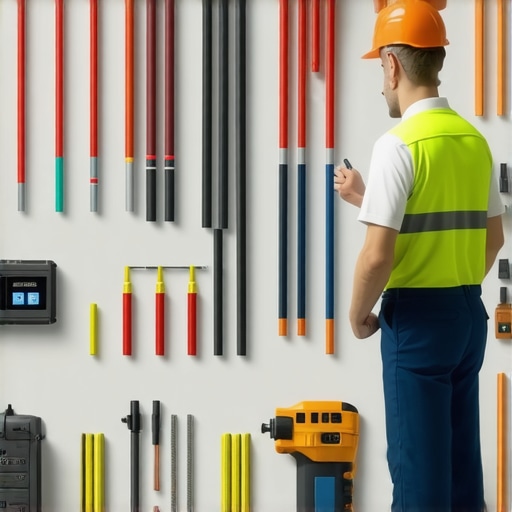
Follow Precise Installation Steps for Rigid Conduits
First, you must measure conduit bends carefully—using a conduit bending spring or similar tool—to avoid sharp turns that could cause damage or violate bend radius rules. When I installed mine last month, I used a simple protractor to ensure each bend stayed within the 6-inch radius limit, which helped passing the inspection easier. After bending, support the conduit every 3 feet using approved clamps, ensuring it doesn’t sag or shift over time. Proper support prevents misalignment and adheres to safety codes, reducing the risk of future failures.
Secure Connections and Proper Grounding
Next, ensure all conduit ends are tightly connected with listed connectors, avoiding loose fittings that can result in electrical arcs. During my upgrade, I double-checked each connection with a torque wrench to meet the manufacturer’s specifications, which eliminated flickering issues during operation. Grounding is equally critical—use a grounding bushing when connecting conduit to boxes, and verify grounding continuity with a multimeter. By doing so, you create a safe, code-compliant path for fault current, preventing shock hazards and landlord violations.
Adhere to Support and Alignment Standards
Align all conduit runs straight and avoid unnecessary overlaps or complex routing that might complicate inspection. I once tried to snake conduit through joists without considering the support points—this resulted in a re-inspection delay. Instead, plan your route to stay within 12 inches of the wall or joist, securing every 4 to 5 feet, and avoid running conduit across moving parts or near heat sources. This meticulous support prevents conduit stress and misalignment, keeping the installation compliant and durable.

Visualize proper conduit support and bend techniques with an illustrative diagram that highlights support spacing, bend radius, and connection points. Proper visuals help clarify these technical standards, making your installation smoother and more code-compliant.
Many homeowners and even some electricians believe that following basic installation steps guarantees code compliance and trouble-free operation of their EV chargers, but this is a dangerous misconception. One of the most pervasive myths is that simply using the correct wire gauge is enough. In reality, nuances such as proper grounding, support spacing, and adherence to bend radii are equally crucial and often overlooked, leading to costly violations or safety hazards. In my experience, neglecting detailed code requirements, especially with the upcoming 2026 standards, can cause failures during inspections, delays, and even fire risks.
A common trap is assuming that troubleshooting connectivity issues or panel upgrades are straightforward tasks. While this might seem true for simple problems, advanced errors like V2G sync failures or load balancing issues demand a deeper understanding of the underlying code nuances. For instance, a misinterpretation of the recent neutral and grounding rules can invalidate an entire installation, especially when upgrades override previous codes. Experts recommend reviewing authoritative resources, such as detailed guides on ensuring code compliance during EV charger installations, which highlight critical points often missed.
So, what are some advanced mistakes installers make that could jeopardize your project? One critical mistake is ignoring the importance of dedicated circuits and the proper placement of disconnects. Installing a charger on a shared circuit or neglecting to install a properly rated disconnect can lead to non-compliance and safety issues. Additionally, improper grounding strategies—like skipping the use of listed bonding and grounding bushings—are frequent causes of inspection failures. Remember, grounding isn’t just a formality; it’s a vital safety feature that must meet specific code standards to prevent shocks and fire hazards.
From my perspective, understanding the subtle requirements in the 2026 standards and applying them diligently makes all the difference. For example, ensuring your conduit supports are compliant and that your wiring methods meet the latest AFCI and GFCI rules can prevent costly reworks. Also, consider that many troubleshooting steps—such as fixing voltage drops or wiring faults—necessitate comprehensive knowledge rather than quick fixes. When in doubt, consulting reliable resources and experts can save time and money.
Now, for those looking to master these nuances, it’s wise to revisit the extensive guidelines on verifying code compliance, available at how to verify code compliance. Avoid the trap of assuming your initial installation is flawless—continuous learning and adherence to updated standards are key.
Have you ever fallen into this trap? Let me know in the comments.
Maintaining your EV charging setup isn’t a set-it-and-forget-it task; it requires attention, proper tools, and proactive measures to ensure optimal performance. One essential tool I rely on is a high-quality digital multimeter. I use a Fluke 117 because of its reliability and precise readings, especially when verifying grounding continuity or checking voltage levels during troubleshooting. Regularly testing your system with such a multimeter helps catch potential issues before they escalate, saving time and reducing safety risks.
Another vital piece of equipment is a dedicated circuit tester or outlet analyzer, like the idealNetworks Fluke T5-600. This device allows me to quickly verify correct wiring, presence of GFCI or AFCI faults, and overall circuit health. Incorporating these tools into my routine inspections ensures that everything complies with updated codes, especially as standards evolve toward 2026 requirements. Being proactive with these tools also makes troubleshooting faster when problems arise, enabling me to pinpoint faults with confidence.
Beyond hardware, software plays a crucial role. I use the code verification guides periodically to stay current with regulations. It’s vital because, as I learned from authoritative sources, even a minor oversight can lead to fail inspections, costly rewiring, or safety hazards. A trend I foresee is the increasing integration of smart diagnostic tools that connect to your smartphone, providing real-time alerts and diagnostics for issues like voltage fluctuations or grounding faults, making maintenance even more accessible and immediate.
How do I maintain my charging system over time?
Routine inspection is key. I schedule visual checks every six months to look for loose fittings, corrosion on connectors, or signs of overheating. By unplugging and examining the connectors, I ensure everything remains tight and clean, preventing future faults. I also verify the integrity of insulation and support supports, which are critical to ensuring compliance with code and longevity of the system. Additionally, I keep firmware updated for smart chargers, as manufacturers often release patches that improve stability and security. Staying on top of these updates can prevent bugs or malfunctions that could compromise safety or performance.
Scaling your system as your EV fleet grows or as technology advances involves upgrading your panel and wiring methods. For this, I recommend consulting comprehensive guides like panel upgrade protocols to ensure future-proofing. Regular maintenance combined with these tools and best practices not only keeps your system reliable but also Readies you for upcoming code changes and innovations.
Remember, a well-maintained EV charger setup protects your investment, ensures safety, and helps you stay compliant. Don’t hesitate to invest in quality tools and stay informed—these small steps pay off in big ways. Why not try verifying grounding continuity with your multimeter this week as an initial maintenance step? It’s simple but effective and puts you ahead in keeping your EV system in top shape.

Visualize a technician using a digital multimeter to verify grounding and voltage levels in an EV charging setup, highlighting the importance of proper tools in maintenance efforts. Proper visuals help demystify technical troubleshooting and emphasize best practices.
Lessons That Changed My Whole Approach
- The biggest misconception I had was believing that selecting the right wire gauge was enough; I realized later that proper conduit support and accurate bend radii are equally critical for code compliance and safety.
- I learned the hard way that neglecting detailed support spacing can cause inspection failures, even if the installation looks correct at first glance—attention to detail saves time and money.
- One lightbulb moment was understanding how proper grounding strategies integrate into the overall conduit setup, preventing shock hazards and ensuring compliance with 2026 standards.
Tools and Resources That Keep Me Ahead of the Curve
- My go-to resource is the comprehensive guide on verifying code compliance. It helps me double-check every aspect of installation to prevent costly re-inspections.
- The Fluke 117 multimeter is essential—I trust its accuracy for testing grounding and voltage, giving me confidence that my system is safe and up to code.
- Upgrading to software-based diagnostic tools, like smart circuit analyzers, allows me to catch potential issues early and ensure that my installations meet evolving standards effortlessly.
Your Path Starts Now
Remember, mastering the nuances of rigid conduit installation not only keeps you compliant with the 2026 standards but also builds a safer, more reliable EV charging setup. Every successful project is a testament to the value of ongoing learning and meticulous attention to detail. Take that first step today—review your current setup, verify grounding, and support your conduit correctly. Your future self will thank you for it.